
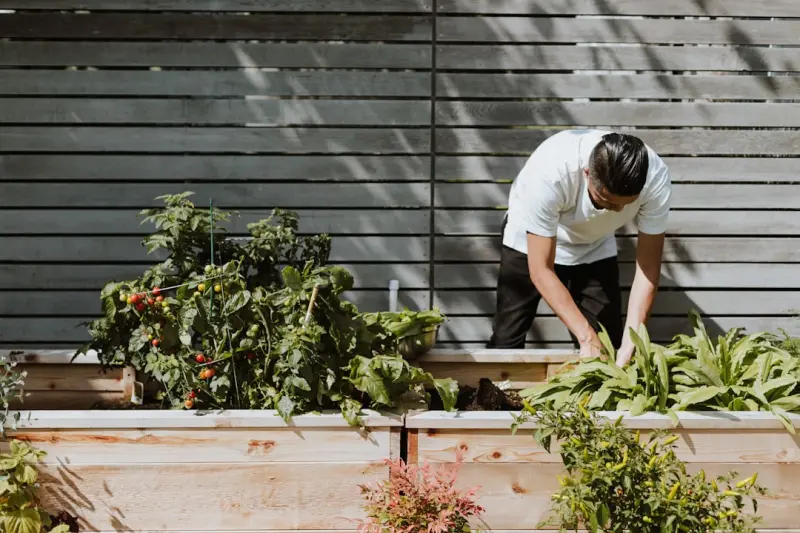
When I first moved into my modest suburban lot, the backyard looked like a patchwork of sun‑baked concrete and a lone, wilted lawn. I was determined to turn that neglected strip into a resilient food oasis, but I didn’t have a fancy smart‑garden system or a budget that could fund a full‑scale redesign. What I needed was a pragmatic, low‑tech roadmap that respected the land’s natural quirks and still delivered fresh produce throughout the growing season. This is the story of how I cultivated a series of backyard microclimates—tiny, purpose‑built environments that work with the sun, wind, and soil rather than against them.
Why Microclimates Matter More Than You Think
Most homeowners think of their garden as a single, uniform plot, but the reality is far more nuanced. A microclimate is a localized climate zone that differs from the surrounding area in temperature, humidity, wind exposure, or light intensity. Even a subtle slope, a stone wall, or a cluster of mature trees can create a pocket that is a few degrees warmer or cooler than the rest of the yard.
Understanding and harnessing these variations is the secret sauce behind year‑round harvests. It allows you to match plants to their ideal conditions without resorting to artificial heating or cooling. In other words, you let nature do the heavy lifting while you provide the scaffolding.
Step 1: Map Your Yard’s Sun and Shade Patterns
Grab a notebook, a compass (or a smartphone compass app), and a simple sketch of your backyard. Over the course of a week, note the following:
- Morning Sun (East‑Facing): Areas that bask in sunlight before noon.
- Afternoon Heat (South‑Facing): Spots that receive strong, direct sun after lunch.
- Full Shade (North‑Facing or Under Overhangs): Locations that stay cool and dim.
Use a kitchen timer or a free sunlight calculator to track how many hours each zone receives. Mark these zones on your sketch with different colors. This visual map becomes the foundation for placing heat‑loving vegetables like tomatoes and peppers in the sunniest pockets, while shade‑tolerant greens such as spinach and lettuce find refuge in cooler corners.
Step 2: Gauge Wind and Moisture Dynamics
Wind can be both a friend and a foe. A gentle breeze reduces fungal disease pressure, but strong gusts dry out soil and can damage delicate seedlings. To assess wind patterns, stand at eye level in each zone on a breezy day and observe:
- Direction of prevailing wind.
- Speed (you can estimate by holding a piece of paper and noting how it flutters).
Identify natural windbreaks—hedges, fences, or even a row of tall, sturdy shrubs. If a zone is overly exposed, consider installing a simple lattice or a row of evergreen screens to temper the gusts.
Step 3: Build Living Soil—The Heart of Every Microclimate
Healthy soil is the great equalizer; it buffers temperature swings, retains moisture, and feeds plants with a steady stream of nutrients. Start by performing a quick soil texture test: fill a jar with garden soil, add water, shake, and let it settle. The layers that form will tell you the sand, silt, and clay composition.
From there, follow these three pillars of soil health:
- Organic Matter: Incorporate compost, leaf mold, or well‑rotted manure. Aim for at least 3–5 inches mixed into the top 12 inches of soil.
- Beneficial Microbes: Sprinkle a handful of mycorrhizal inoculant or a cup of fermented plant juice (a DIY kelp & molasses brew) around the root zone to boost fungal networks.
- Structure: Add coarse sand or fine gravel to heavy clay soils to improve drainage, and introduce straw or shredded bark to sandy soils to increase water retention.
By treating each microclimate as a distinct soil ecosystem, you can fine‑tune pH, nutrient levels, and texture to suit the resident plant community.
Step 4: Choose Plants That Thrive in Their Niche
Now that you’ve charted sunlight, wind, and soil, it’s time to match plants to each zone. Here’s a quick guide:
- Hot, South‑Facing Beds (6–8 hrs sun): Tomatoes, peppers, eggplants, basil, and heat‑loving beans.
- Morning Sun, Afternoon Shade: Leafy greens (kale, Swiss chard), carrots, beets, and cool‑season herbs like cilantro.
- Full Shade: Root crops with low light tolerance (radishes, arugula) and shade‑loving perennials such as rhubarb or sorrel.
- Wind‑Protected, Moist Corners: Fruit bushes (blueberries, currants) and moisture‑loving herbs (mint, lemon balm).
Don’t shy away from heirloom varieties. They often possess deeper root systems and greater resilience, making them perfect candidates for low‑input gardening.
Step 5: Harness Rainwater—Low‑Tech Water Management
Water is the most critical variable, and the smartest gardeners treat it like a precious commodity. Install a modest rain barrel (around 200 gallons) beneath a downspout that drains a sunny, open area. Connect the barrel to a simple gravity‑fed drip system using a bulkhead fitting, so water reaches your beds without a pump.
For sloped terrain, shape shallow swales—contour‑following ditches lined with mulch—to capture runoff and allow it to infiltrate slowly. This technique reduces erosion while recharging the soil’s moisture reservoir.
Step 6: Seasonal Layering—Mulch, Cover Crops, and Cold Frames
Mulching is a one‑size‑fits‑all solution that pays dividends. Spread a 2–3 inch layer of shredded leaves, straw, or wood chips over each microclimate. Benefits include temperature moderation, weed suppression, and organic matter addition as the mulch decomposes.
In the off‑season, plant cover crops like clover or winter rye. These “green manures” protect the soil from harsh weather, fix nitrogen, and improve structure. When spring arrives, mow the cover crops and incorporate them into the soil as a living compost.
For the coldest spots—particularly the north‑facing side—consider building a simple hoop house using PVC pipe and clear garden fabric. This low‑cost structure traps solar heat, extending the growing season for tender crops.
Step 7: Invite Beneficial Wildlife
A thriving garden is a bustling ecosystem. Install a few sustainable home fixes that double as wildlife habitats:
- Bee Hotels: Bundle bamboo reeds or hollow reeds into a wooden box to provide nesting sites for solitary bees.
- Bird Baths: A shallow dish of water attracts insect‑eating birds, which help keep pest populations in check.
- Native Plant Borders: Plant native wildflowers along the perimeter to support pollinators and beneficial insects.
These small additions create a self‑regulating garden where nature assists you in pest control and pollination.
Step 8: Track Progress—Simple Data Without the Overhead
You don’t need a sophisticated IoT platform to monitor your garden’s health. A basic spreadsheet can capture key metrics:
- Planting dates and varieties.
- Watering frequency and volume.
- Harvest yields per microclimate.
Over time, patterns emerge. You’ll discover that the south‑west corner consistently produces a bumper crop of tomatoes, while the shaded nook yields a steady supply of lettuce. Armed with this knowledge, you can fine‑tune planting schedules and resource allocation year after year.
Step 9: Integrate Technology Thoughtfully (Optional)
If you’re curious about blending low‑tech methods with smart tools, there’s value in exploring the smart garden innovations that complement, rather than dominate, your microclimate strategy. Simple soil moisture probes can confirm that your rain barrel system is delivering enough water, while a basic weather station can alert you to frost risk, allowing you to cover vulnerable seedlings in time.
Remember, the goal is to let the garden’s natural rhythms drive decisions, not to impose a technology‑first mindset.
Step 10: Reap the Benefits—and Share the Harvest
After a full season of mindful microclimate management, the rewards extend beyond fresh produce:
- Food Security: A diversified, year‑round harvest reduces reliance on grocery stores.
- Financial Savings: Homegrown vegetables cut grocery bills and lower your carbon footprint.
- Mental Well‑Being: Tending to a garden has been shown to lower stress and improve mood.
- Community Connection: Sharing surplus produce with neighbors builds social ties.
In my own backyard, the once‑barren plot now yields heirloom tomatoes in midsummer, crisp kale in early fall, and even a modest winter harvest of spinach under the protection of a hoop house. The microclimates I created have turned my garden into a dynamic, resilient ecosystem that feeds both body and soul.
Final Thoughts: Embrace the Small‑Scale Revolution
Microclimate gardening is a celebration of nuance. It teaches us to observe, adapt, and work with the land’s innate diversity. You don’t need a multi‑million‑dollar smart‑home system to achieve a thriving garden—just a notebook, a few simple tools, and a willingness to experiment. Start small, map your zones, and let each micro‑environment guide your planting choices. Before long, you’ll find that the secret to a bountiful backyard lies not in grand gestures, but in the subtle, intentional tweaks that honor the unique character of every square foot.

David MacKinnon is a dynamic freelance writer known for his captivating storytelling and keen insights into the world of technology. With a passion for exploring the intersection of innovation and everyday life, he crafts engaging narratives that not only inform but also inspire his readers.
Related Posts

Pocket Gardens: Turning Forgotten Corners into Lush Urban Oases
Discover the art of pocket gardens—small, affordable green spaces that turn under‑used nooks int... Read More

Breathing New Life into Your Home: A Comprehensive Guide to Home Restoration
Learn how to prioritize your home's needs, work with professionals, and stay on budget to achieve a ... Read More
Scented Pathways: Transforming Your Walkway into a Year‑Round Aromatic Journey
Turn ordinary garden walks into sensory experiences with a year‑round scented pathway—learn plan... Read More
Top Posts

Decoding the Home Inspection Report: A Practical Guide for Buyers and Sellers
A step‑by‑step guide to interpreting home inspection reports, prioritizing repairs, and using the findings for smarter negotiations and long‑term maintena...Read More

Building a Sustainable Foundation: Strategies Every Contractor Should Know
Explore how smart soil assessment, low‑carbon concrete, and integrated insulation transform foundations into sustainable, long‑lasting building platforms....Read More
Quiet Revolution: Acoustic-Focused Garage Construction
Discover why acoustic performance matters in garage builds and explore materials, design tactics, and budget-friendly upgrades to create a quiet, functional spa...Read More

Sustainable Bathroom Renovations: A Greener Approach
Sustainable bathroom renovations are an excellent way to reduce your carbon footprint and create a healthier living space. Learn how to create a greener bathroo...Read More
0 Comments
Post Comment
You will need to Login or Register to comment on this post!