
Your outdoor living space is often the heart of your home during the warmer months. Whether you are hosting weekend barbecues or enjoying a quiet morning coffee, your outdoor area deserves to look its best. Over time, exposure to harsh sunlight, rain, and fluctuating temperatures can cause wood to fade, splinter, or peel. Learning how to properly maintain your Decks is essential for both aesthetic appeal and long-term structural integrity.
Refinishing a weathered structure might seem like a daunting weekend project, but with the right preparation and professional-grade materials, you can restore its original beauty. This comprehensive guide will walk you through the essential steps to achieve a professional finish that stands the test of time.
Assessing the Condition of Your Wood
Before you begin the physical labor, you must determine exactly what your project requires. Not all wood surfaces are the same, and some may have deeper issues than just surface-level fading. Conduct a thorough visual inspection to identify any loose boards, protruding nails, or signs of wood rot.
If you notice boards that are soft to the touch or crumbling, these pieces likely need to be replaced rather than restored. Patching rot is rarely effective in the long run. Once you have cleared the surface of debris and addressed any structural repairs, you are ready to begin the deep cleaning process.
The Importance of Proper Cleaning
You cannot effectively apply a new finish to a dirty surface. Dirt, mildew, and remnants of old coatings act as a barrier that prevents new treatments from penetrating the wood fibers. Start by sweeping away loose leaves and branches, then use a quality wood cleaner designed for exterior use.
Using a pressure washer can save significant time, but you must be careful. Excessive pressure can gouge the wood, causing permanent damage that is difficult to smooth out later. If you choose to use a power washer, keep the nozzle moving constantly and maintain a safe distance from the surface.
Sanding for a Smooth Foundation
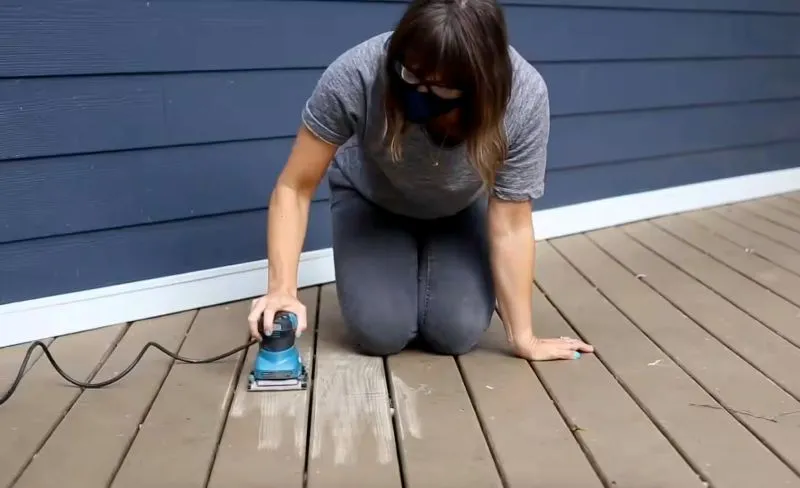
Once the wood has dried completely, usually after 24 to 48 hours, you move into the most transformative phase: Sanding. This step is critical because it removes dead, gray wood fibers and creates a uniform profile that accepts new coatings evenly.
Use a random orbital sander for the main sections of your deck. For the tight spots, such as between the boards and around railings, you will need to use a hand sanding block. Start with a medium-grit sandpaper, around 60 to 80 grit, to remove the bulk of the old finish and imperfections. Follow up with a 100-grit sandpaper for a smooth, splinter-free touch.
Safety Equipment for Sanding
Sanding creates a significant amount of fine dust, which can be harmful if inhaled. Always wear a high-quality dust mask or respirator. Additionally, use eye protection to guard against flying debris and wear hearing protection if you are using power tools for an extended period.
Choosing the Right Product for Refinishing
The process of Refinishing is only as good as the product you choose. There are several categories of wood treatments available, each serving a different purpose. Understanding these differences will help you decide the best course of action for your specific environment.
- Transparent Stains: These provide minimal color change and are best for high-quality woods like cedar or redwood.
- Semi-Transparent Stains: These offer a balance between wood grain visibility and UV protection.
- Solid Stains: These act more like paint, hiding the grain but offering the highest level of protection against sunlight.
If your wood is old and has many imperfections, a solid stain is often the better choice because it covers discoloration effectively. If you have brand-new pressure-treated lumber, you might prefer a semi-transparent option to showcase the natural beauty of the material.
The Art of Professional Staining
After the sanding process is complete, you must remove all dust using a shop vacuum or a dampened cloth. Once the surface is pristine, you can begin the Staining process. The key to a professional look is avoiding "lap marks," which occur when the stain dries in one area before you finish the rest of the board.
Work in small sections, typically staining two to three boards at a time from one end to the other. Apply the product using a high-quality brush or a specialized deck pad. Pay close attention to the edges and the ends of the boards, as these areas are the most susceptible to moisture damage.
Tips for Even Coverage
Consistency is key to a uniform finish. Ensure you are using the same batch of product throughout the entire project to avoid slight color variations. If you are using multiple cans, it is a good idea to mix them together in a large bucket before starting, a process known as "boxing."
Drying and Curing Times
Patience is the final ingredient in a successful deck restoration. Many homeowners make the mistake of walking on the surface too soon after the application. While the wood might feel dry to the touch within a few hours, the chemical curing process takes much longer.
Check the manufacturer’s instructions on the back of your product container. Usually, you should wait at least 24 to 48 hours before replacing your furniture and foot traffic. Applying heavy weight too early can cause the stain to scuff or peel, undoing your hard work.
Maintaining Your Hard Work
Now that your outdoor space looks brand new, you want to keep it that way for as long as possible. Regular maintenance is far easier than a full restoration. Develop a habit of clearing debris from the surface every few weeks to prevent moisture buildup.
At least once a year, perform a light cleaning with a gentle detergent. Keep an eye on areas that receive the most sun, as these spots will likely require a touch-up sooner than shaded areas. By proactively maintaining your deck, you extend the life of your wood and ensure your investment remains a centerpiece of your home.
Final Thoughts on Deck Restoration
Refreshing an old deck is one of the most rewarding home improvement projects you can undertake. It provides an immediate visual upgrade and adds significant value to your property. By following these steps—cleaning, sanding, and applying the right finish—you ensure a result that looks professional and lasts for years.
Remember that the quality of your prep work directly influences the longevity of the final result. Do not rush through the cleaning or sanding stages. Take your time, enjoy the process, and soon you will be back out on your deck, enjoying the beautiful outdoor oasis you created yourself.
If you find yourself overwhelmed at any stage, do not hesitate to consult with professionals or local hardware store experts. They can provide specific advice based on your local climate and the type of wood used for your deck construction. With the right tools and a little bit of elbow grease, you can transform a tired, gray structure into a vibrant, inviting space for your family to enjoy all season long.

When it comes to the world of blogging and writing, Rose DesRochers is a name that stands out. Her passion for creating quality content and connecting with her audience has made her a trusted voice in the industry. Aside from her skills as a writer and blogger, Rose is also known for her compassionate nature.
Related Posts

Design a Home Office Oasis That Boosts Focus and Well‑Being
Turn your remote‑work corner into a soothing oasis. Learn how lighting, sound, ergonomic furniture... Read More

Unplugged Power: Simple Hacks to Stop Energy Vampires at Home
Learn how to locate and cut out the silent electricity leeches in your house with easy plug‑manage... Read More

You’ll Want an Air Purifier This Cold and Flu Season: A Proactive Approach to Indoor Air Quality
When the temperature drops and the days grow shorter, the familiar chorus of coughs, sneezes, and so... Read More
Top Posts

Adaptive Window Dressings: Merging Comfort, Energy, and Wellness
Modern window dressings are evolving into intelligent systems that manage light, heat, sound, and health. Discover how adaptive fabrics, automation, and data-dr...Read More

Smart Snow Strategies: Turning Winter Chaos into Operational Advantage
Snow removal can be more than a seasonal chore. By leveraging sensors, predictive analytics, autonomous equipment, and eco‑friendly melt systems, facilities t...Read More

Data‑Driven Lawn Care: Turning Your Yard Into a High‑Performance Asset
Learn to modernize lawn care with sensors, smart controllers, and data‑driven strategies, turning your backyard into a high‑performance, low‑maintenance a...Read More

Creating a Year‑Round Outdoor Oasis: Sustainable Design Tips for Every Season
Learn to transform your garden into a sustainable, year‑round oasis with expert tips on materials, lighting, water use, and low‑maintenance design....Read More
0 Comments
Post Comment
You will need to Login or Register to comment on this post!