
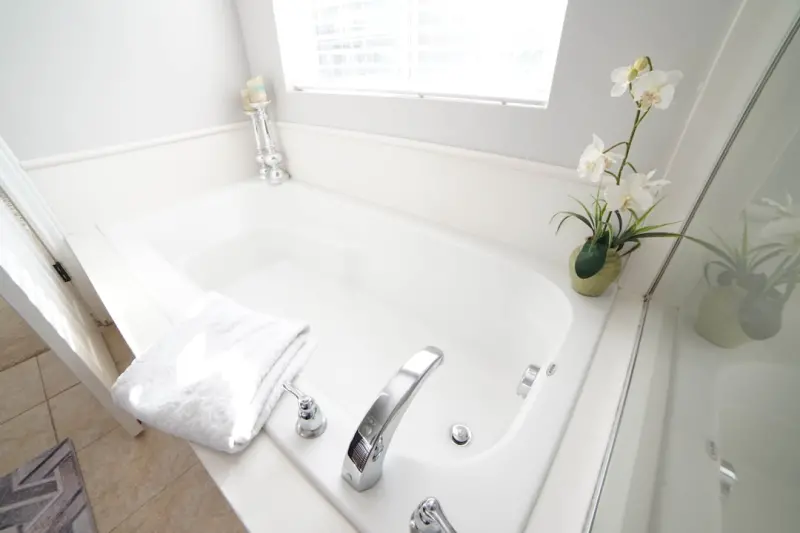
When I first stood in my bathroom, staring at a chipped, yellowed tub that had seen better decades, I felt a pang of disappointment mixed with a spark of possibility. The tub wasn’t broken; it was simply tired of its own story. I could have called a contractor, gutted the room, and started from scratch, but the idea of a full remodel felt both wasteful and financially draining. That’s when I discovered bathtub refinishing—a process that feels like giving an old friend a fresh coat of confidence.
Why Bathtub Refinishing Deserves a Spot on Your Home‑Improvement Radar
Refinishing a bathtub is more than a quick cosmetic fix; it’s a strategic decision that intersects three core homeowner concerns:
- Cost efficiency: A professional refinishing job typically runs between $300 and $800, a fraction of the $3,000‑$8,000 you’d spend on a full replacement.
- Sustainability: By preserving the existing tub, you keep a large amount of material out of landfills—a small but meaningful step toward greener living.
- Speed: Most refinishing projects wrap up in one to three days, meaning you’re back to your nightly routines faster than a demolition‑and‑rebuild scenario.
These advantages align perfectly with the Repair Calendar Method, which encourages homeowners to prioritize low‑impact fixes that cumulatively save money and resources.
My Personal Journey: From Skepticism to a Spa‑Like Sanctuary
I won’t pretend I was an expert when I first considered refinishing. Like many, I was haunted by horror stories of bubbling coatings, lingering odors, and endless maintenance. I decided to arm myself with knowledge before handing over my bathroom to anyone.
First, I researched reputable local refinishing specialists, paying close attention to their certifications and warranty terms. A trustworthy company will typically use epoxy or urethane systems—both engineered to withstand daily wear, chemical exposure, and temperature fluctuations. I also asked to see before‑and‑after portfolios, which helped me visualize what my own tub could become.
Next, I tackled the prep work myself, because the surface’s condition is the single biggest predictor of a successful finish. That meant cleaning, sanding, and addressing any underlying mold or mildew. For this, I leaned on the expertise found in the mold removal guide. Proper mold eradication isn’t just about aesthetics; it protects the new coating from premature failure.
Once the surface was pristine, the refinishing team applied a high‑gloss, low‑VOC coating. The result? A gleaming, porcelain‑like finish that reflected light like a spa‑grade bathtub. The transformation was not just visual; it was emotional. Walking into my bathroom felt like stepping into a personal retreat, and that feeling has lingered ever since.
The Science Behind a Durable Finish
Understanding the chemistry can help you evaluate service quotes and make informed decisions:
- Epoxy coatings consist of a resin and a hardener that, when mixed, create a rigid, high‑strength polymer. They’re excellent for resisting scratches and chemicals but can be slightly less flexible under extreme temperature shifts.
- Urethane (polyurethane) systems incorporate flexibility into the polymer chain, offering superior resistance to impacts and chipping. They often come in water‑based formulas that emit fewer odors.
Both systems rely on a priming stage that promotes adhesion. Skipping the primer or using an unsuitable primer is the number‑one cause of bubbling or delamination down the line. This is why seasoned professionals never cut corners on surface preparation.
Choosing the Right Color and Finish for Your Lifestyle
Color isn’t just a decorative choice; it can influence mood, perceived space, and even resale value. Here are a few trends I explored, each backed by subtle psychological benefits:
- Classic White: Timeless, it amplifies natural light, making smaller bathrooms feel airy. It also signals cleanliness—a key factor for potential buyers.
- Soft Greys and Blues: These cool tones create a calming, spa‑like ambiance. They pair well with matte or satin finishes that reduce glare.
- Bold Blacks or Deep Charcoals: When paired with contrasting fixtures, a dark tub becomes a dramatic focal point that exudes modern luxury.
When selecting a finish, consider whether you prefer a high‑gloss surface (reflective, sleek) or a satin/matte option (subtle, less prone to spotting water droplets). A satin finish can also mask minor imperfections that might develop over years of use.
Eco‑Friendly Coatings: A Greener Path to Luxury
Many refinishing companies now offer low‑VOC (volatile organic compounds) or even zero‑VOC coatings. These formulas reduce indoor air pollution and align with sustainable building practices. While they sometimes come at a modest premium, the health benefits—especially for households with children, seniors, or respiratory sensitivities—are worth the investment.
For homeowners who are truly committed to reducing their carbon footprint, ask providers about reclaimed or recycled content in the coating matrix. Some manufacturers blend post‑consumer plastics into their urethane systems, turning waste into performance.
DIY vs. Professional: Weighing the Pros and Cons
There’s a growing DIY community around bathtub refinishing, fueled by YouTube tutorials and kits sold at hardware stores. While the DIY route can be tempting—particularly if you love hands‑on projects—there are critical considerations:
- Skill Level: Achieving a flawless, glass‑like finish requires precise mixing, timing, and even environmental conditions (temperature, humidity). A slight misstep can ruin the coating.
- Warranty: Professional jobs usually come with a 5‑year warranty on the finish, offering peace of mind. DIY attempts rarely include any guarantee.
- Safety: Proper ventilation, protective gear, and disposal of chemicals are essential. Professional crews are trained to handle these aspects safely.
If you’re an experienced handyman and willing to invest the time for meticulous prep, a DIY project could work. However, for most homeowners—especially those looking for a stress‑free experience—I recommend hiring certified refinishing specialists.
Budgeting Your Refinishing Project
Even though refinishing is cheaper than replacement, budgeting wisely ensures you avoid hidden costs. Here’s a simple framework inspired by the Repair Calendar Method:
- Initial Inspection: Allocate $100‑$150 for a professional assessment. This step identifies any structural issues (cracks, rust) that might require extra repair before coating.
- Surface Preparation: Some companies include prep in the base price; others charge extra for extensive sanding or mold remediation. Clarify this upfront.
- Coating Selection: Decide between epoxy (generally less expensive) and urethane (higher durability). Expect a $50‑$100 price differential.
- Warranty & After‑Care: A solid warranty may add $100‑$200 but protects your investment long‑term.
When you tally these items, a typical project lands between $600 and $1,200, leaving room in your home‑improvement budget for accessories like new faucet hardware or a stylish shower curtain.
Sealing the Gaps: Extending the Life of Your Refinished Tub
Even after a perfect finish, the surrounding bathroom envelope plays a role in how long that finish lasts. Moisture infiltration behind tiles or under the tub can cause future issues. A quick, cost‑effective tactic is to apply a thin sealant around the tub’s perimeter, especially where the tub meets the wall.
For a broader approach to moisture management, consider the principles in Seal the Gaps. While the original guide focuses on insulation, the same mindset—identifying and sealing hidden cracks—applies to bathroom envelopes. A simple silicone caulk, applied every few years, can prevent water from seeping into grout lines, protecting both the refinished surface and the underlying subfloor.
Maintenance Tips to Keep That Spa‑Like Shine
After the initial excitement, maintaining the new finish is key to preserving its allure:
- Gentle Cleaning: Use non‑abrasive cleaners—pH‑balanced bathroom soaps or a mixture of mild dish soap and warm water. Avoid harsh acids, bleach, or scouring pads that can dull the coating.
- Dry After Use: A quick squeegee or towel wipe-down reduces water spots and prevents mineral buildup, especially in hard‑water areas.
- Address Stains Promptly: If you notice soap scum or discoloration, treat it within 24‑48 hours. A paste of baking soda and water, left for 10 minutes before rinsing, works wonders without scratching.
- Periodic Inspection: Once a year, check the caulk and grout for cracks. Re‑seal as needed to keep moisture at bay.
Future‑Proofing: What’s Next for Bathtub Refinishing?
The industry is evolving rapidly, with innovations that could reshape how we think about bathroom upgrades:
- Smart Coatings: Emerging nano‑coatings claim to be self‑cleaning and antimicrobial, reducing the need for frequent scrubbing.
- Color‑Changing Pigments: Thermochromic paints can shift hue with temperature changes, creating dynamic visual effects.
- Integrated LED Lighting: Some refinishing kits now incorporate waterproof LED strips beneath the finish, offering ambient lighting without rewiring.
While many of these technologies are still in pilot phases, they illustrate the potential for refinishing to become a platform for high‑tech, high‑design bathroom experiences—without the massive disruption of a full remodel.
Final Thoughts: Your Tub, Your Canvas
Bathtub refinishing isn’t just a repair; it’s an opportunity to reimagine a core piece of your home’s daily ritual. By approaching the project with a blend of strategic budgeting, thoughtful design, and sustainable practices, you can transform a tired tub into a centerpiece that reflects both personal style and environmental consciousness.
Whether you decide to enlist a seasoned professional or roll up your sleeves for a DIY adventure, remember that the most lasting upgrades are those that respect the existing structure while adding a fresh layer of value. Your bathroom—and the moments you spend within it—deserve nothing less.

When it comes to the world of blogging and writing, Rose DesRochers is a name that stands out. Her passion for creating quality content and connecting with her audience has made her a trusted voice in the industry. Aside from her skills as a writer and blogger, Rose is also known for her compassionate nature.
Related Posts
Why Bathtub Refinishing Is the Underrated Asset Boost Every Landlord Needs
Bathtub refinishing offers a cost‑effective, quick turnaround solution that boosts property value,... Read More
Beyond the Gloss: Crafting Smart, Sustainable Bathrooms with Bathtub Refinishing
Bathtub refinishing is evolving from a quick fix to a platform for design, sustainability, and smart... Read More

The Strategic Benefits of Bathtub Refinishing for Modern Homeowners
Bathtub refinishing offers a cost‑effective, eco‑friendly way to revitalize bathrooms, improve w... Read More
Top Posts
Waterproofing as a Design Feature: Elevate Protection with Style
Learn to turn waterproofing into a stylish upgrade with decorative membranes, hidden drainage, and smart moisture monitoring, all while boosting energy efficien...Read More

Revolutionizing Energy Inspection: A Human‑First, Data‑Driven Approach
A human‑first, data‑driven energy inspection framework turns traditional checklists into dynamic conversations, integrates edge sensors, occupancy analytics...Read More

Rethinking Commercial Renovations: The Rise of Data‑Driven Space Planning
A deep dive into using occupancy sensors, movement analytics, and environmental data to create smarter, more efficient commercial renovation designs that delive...Read More

Why Digital Twins Are the Secret Weapon in Commercial Renovations
Digital twins are reshaping commercial renovations by providing real‑time, data‑rich virtual replicas that streamline design, enhance sustainability, and un...Read More
0 Comments
Post Comment
You will need to Login or Register to comment on this post!