
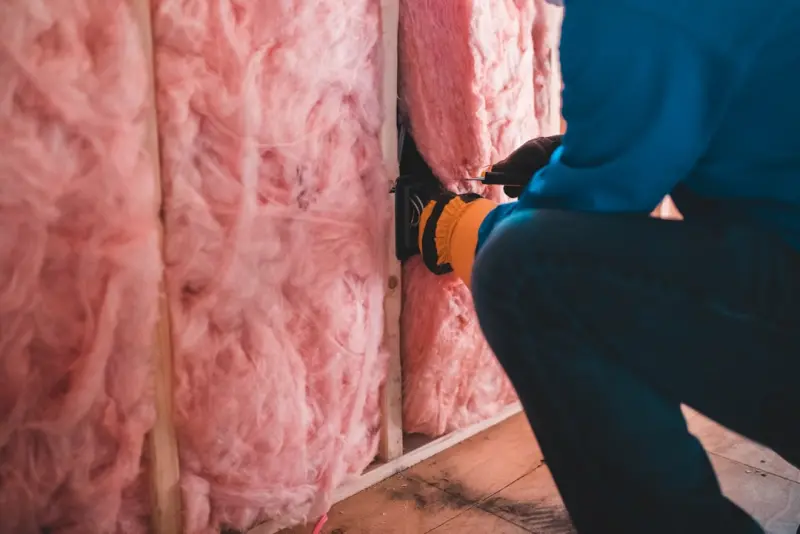
When I first moved into my starter home, the first thing that jumped out at me wasn’t a cracked tile or a leaky faucet—it was the way the house seemed to breathe. In winter, the living room felt like a refrigerator, and in summer the bedroom turned into an oven. The culprit? Sloppy, forgotten insulation. I’ve spent countless weekends in the attic, crawling under rafters, and pulling up baseboards, all to learn the art of DIY insulation. Below is the playbook I’ve built from trial, error, and a stubborn refusal to hand over my hard‑earned dollars to a contractor.
Why Insulation Deserves Your Weekend Attention
Good insulation does more than keep you cozy; it’s a silent guardian of your wallet, your health, and even your home’s carbon footprint. The U‑value of a wall or ceiling—essentially a measure of heat loss—drops dramatically when you seal gaps and add proper batts. A well‑insulated envelope can shave 10‑30 % off your heating and cooling bills, and that translates to fewer furnace cycles, less wear on your HVAC, and a lower chance of mold thriving in damp, cold corners.
Beyond the numbers, there’s a psychological payoff. Knowing that you’ve taken a tangible step toward a more energy‑efficient home brings a quiet confidence that you’re not just a passive occupant—you’re an active steward of the space.
Spotting the Sneakiest Heat‑Leak Sources
Before you rush to buy rolls of fiberglass, you need to map out where your house is losing heat. The most common culprits are:
- Attic and roof spaces—unfilled joist cavities and thin attic floors.
- Exterior walls—especially older homes with no cavity insulation.
- Floors above unconditioned spaces—like basements or crawlspaces.
- Doors and windows—air leaks around frames, poorly sealed glazing.
- Electrical and plumbing penetrations—tiny gaps around pipes, ducts, and wiring.
Grab a simple thermal leak detector (or even a lit incense stick) and walk the perimeter of each room. Watch how the smoke dances—if it’s pulled rapidly toward a seam or crack, you’ve found a draft.
Tools of the Trade (You Probably Already Own Most of Them)
DIY insulation doesn’t require a Ph.D. in building science, just a sensible toolbox. Here’s my go‑to kit:
- Protective gear: gloves, dust mask (N95 or better), safety goggles.
- Measuring tape and a laser level for precise cuts.
- Utility knife with extra blades—insulation material is unforgiving.
- Caulk gun with silicone‑based sealant for airtight finishes.
- Expanding foam (low‑expansion for tight spaces).
- Rigid foam board cutter or a fine‑toothed handsaw.
- Stud finder—helps avoid wiring and plumbing when you’re in the walls.
And a quick reminder: if you’re working around electricity, turn off the circuit at the breaker. Safety first.
Step‑by‑Step DIY Insulation Projects
1. Attic Blanket Upgrade
The attic is the most forgiving place to start. Most homes have a thin layer of blown‑in insulation or nothing at all. Follow these steps:
- Measure the floor joist spacing. Most modern homes use 16‑in or 24‑in centers.
- Buy unfaced fiberglass batts or mineral wool that match that depth. I prefer mineral wool for its fire‑resistance.
- Lay the batts perpendicular to the joists. This “staggered” pattern reduces gaps.
- Seal the edges. Use spray‑foam or caulk to seal where the batts meet the walls or rim joist.
- Cover any exposed beams. Rigid foam board can be glued to the underside of the rafters for a continuous barrier.
Pro tip: If you notice a sagging spot, add a proactive appliance diagnostics approach to your routine—just as you’d check a furnace, give your attic insulation a quick visual audit each season.
2. Wall Gap Sealing (Interior)
Older homes often have gaps between studs and plaster or drywall. While blowing in insulation from the outside is ideal, an interior approach works wonders for smaller sections.
- Locate the studs with a stud finder.
- Drill small pilot holes at the top and bottom of the wall cavity.
- Inject expanding foam—use low‑expansion to avoid bulging.
- Trim excess foam with a utility knife once cured.
- Apply acoustic sealant (silicone) along the perimeter for an airtight finish.
This method not only curbs drafts but also adds a modest layer of sound damping—an unexpected bonus for home offices.
3. Floor‑Under‑Sill Insulation
Cold floors are often the result of uninsulated crawlspaces or basements. Here’s a quick fix for the most accessible zones:
- Lift the baseboard (use a pry bar and work gently).
- Slide in rigid foam board (½‑inch polyiso works well) into the cavity.
- Seal seams with foil‑backed tape.
- Reattach the baseboard and fill any nail holes with caulk.
If the space beneath the floor is a full crawlspace, consider a waterproofing upgrade before you insulate, to keep moisture at bay.
4. Door and Window Draft Stoppers
Even the best‑insulated walls can be compromised by a leaky door. DIY draft stoppers are cheap and effective:
- Weatherstripping: Apply adhesive-backed foam or felt to the door jamb. Replace annually.
- Threshold seal: Install a silicone or rubber threshold that slides under the door when closed.
- Window film: Stretch shrink‑film across the interior pane; it creates an insulating air gap.
- Interior “plug”: For rarely used windows, cut a piece of rigid foam to fit the opening, seal with tape, and store it flat.
Combine these with a quick inspection of your plumbing fixtures—cold water lines running through uninsulated walls can also feel like drafts.
5. DIY Radiant Barrier for the Attic
If you live in a hot climate, a reflective radiant barrier can cut summer heat gain. Install it on the underside of the roof decking before you lay down insulation. Use staples to secure the foil, and make sure seams are overlapped and taped.
Maintaining Your Insulation Over Time
Insulation isn’t a “set it and forget it” project. Seasonal checks are essential:
- Spring: Look for moisture stains on insulation in the attic.
- Summer: Verify that your radiant barrier isn’t sagging.
- Fall: Re‑seal any newly identified drafts before heating season.
- Winter: Watch for condensation on cold surfaces that could indicate gaps.
Document each inspection in a simple spreadsheet—date, location, issue, action taken. Over time, you’ll see patterns and can plan larger upgrades strategically.
Cost‑Benefit Snapshot
Let’s break down the numbers for a typical 1,500‑sq‑ft home:
| Project | Approx. Cost | Estimated Savings |
|---|---|---|
| Attic blanket (fiberglass) | $300 | $150‑$250/yr |
| Wall gap foam (50 ft²) | $80 | $60‑$100/yr |
| Floor under‑sill foam | $120 | $80‑$130/yr |
| Door/window sealing kit | $70 | $50‑$90/yr |
Even a modest investment of $570 can return roughly $340‑$570 per year, meaning payback in under two years for many homeowners.
Putting It All Together: A 12‑Month DIY Insulation Calendar
To keep the momentum, I map out a simple calendar:
- January – Inspect attic for settled insulation, add extra batts if needed.
- March – Seal exterior wall penetrations before spring rains.
- May – Install or refresh radiant barrier; check for any attic leaks.
- July – Focus on door and window draft stoppers; replace weatherstripping.
- September – Add floor‑under‑sill insulation before heating season.
- November – Conduct a full house “energy audit” using a thermal camera app.
This rhythm spreads out labor and cost, while ensuring you never let a single weak spot drag your energy bills down.
Final Thoughts: The DIY Insulation Mindset
Insulation isn’t just a material—it’s a philosophy. It says, “I care enough about my home to get my hands dirty, to measure twice and cut once, and to keep an eye on the details that most people overlook.” When you seal those gaps, you’re not just saving money—you’re creating a more comfortable, resilient, and sustainable living environment for yourself and anyone who steps through your door.
So grab that utility knife, fire up your caulking gun, and start sealing. Your future self (and your thermostat) will thank you.

David MacKinnon is a dynamic freelance writer known for his captivating storytelling and keen insights into the world of technology. With a passion for exploring the intersection of innovation and everyday life, he crafts engaging narratives that not only inform but also inspire his readers.
Related Posts

Breathe New Life Into Vintage Windows: A DIY Home Repair Blueprint
Discover a comprehensive DIY process for restoring vintage wooden windows, from assessing damage and... Read More
DIY Home Repair Toolkit: Simple Strategies for Everyday Fixes
Discover a practical DIY repair toolkit, step‑by‑step fixes for leaky faucets, squeaky doors, an... Read More

Build a Portable DIY Home Repair Kit That Saves Time and Money
A hands‑on guide to creating a portable DIY repair kit, packed with the right tools, smart organiz... Read More
Top Posts

Modular Garage Doors: Turning Overhead Openings into Adaptive Assets
Discover why modular garage doors are the strategic upgrade facilities need—offering interchangeable panels, real‑time data, and seamless integration with s...Read More

You’ll Want an Air Purifier This Cold and Flu Season: A Proactive Approach to Indoor Air Quality
When the temperature drops and the days grow shorter, the familiar chorus of coughs, sneezes, and sore throats begins to echo through homes, offices, and school...Read More

Pocket Greenhouses: Big Harvests From Tiny Spaces
Learn how to create a pocket greenhouse that maximizes limited outdoor space, offering continuous fresh produce, decorative foliage, and a touch of indoor‑out...Read More

Concrete Innovations That Are Reshaping Modern Construction
Explore the latest concrete breakthroughs—from ultra‑high‑performance mixes to 3D printing and self‑healing technology—that are redefining durability,...Read More
0 Comments
Post Comment
You will need to Login or Register to comment on this post!