

Why I Chose to Refinish Instead of Replace
When my vintage claw‑foot tub started showing the first signs of wear—tiny chips, stubborn stains, and a dull glaze—I faced the classic renovation dilemma: splurge on a brand‑new fixture or breathe new life into the old. I chose the latter not only because the tub holds a decade of family memories, but also because refinishing offers a surprisingly sustainable shortcut that cuts landfill waste and reduces the carbon footprint tied to manufacturing and shipping a replacement. The decision felt like a win‑win, letting me preserve the character of my bathroom while staying true to my commitment to eco‑friendly home upgrades.
The Toolkit: From Basics to Pro‑Grade
Before I rolled up my sleeves, I assembled a surprisingly modest set of tools that turned a daunting project into a manageable weekend task. The core items include a high‑quality abrasive pad for surface prep, a reliable respirator to keep fumes at bay, and a microfiber cloth that captures dust without scattering it across the bathroom tiles. I also invested in a dual‑action sander for even sanding, a paint sprayer for flawless coating, and a bucket of premium, low‑VOC epoxy that promised durability without compromising indoor air quality. To keep the list clear, here’s a quick rundown:
- 120‑grit sanding discs
- Respirator with organic vapor cartridges
- Microfiber cleaning cloths
- Dual‑action sander or hand‑held sanding block
- Low‑VOC epoxy or acrylic finish
- Paint sprayer or high‑quality brush
Step‑by‑Step: My Hands‑On Refinishing Process
The actual transformation unfolded in a rhythm that felt part science experiment, part art project, and I documented every moment for future reference. I started by thoroughly cleaning the tub with a non‑abrasive cleaner, then sanded the surface until the old glaze vanished, revealing a uniformly matte base ready to bond with the new coating. Next came the crucial “wet‑sand” stage, where I used a finer grit to smooth out any scratches, followed by a meticulous wipe‑down with a tack cloth to eliminate lingering particles. The turning point arrived when I mixed the epoxy according to the manufacturer’s instructions, loaded the sprayer, and applied a thin, even coat that glistened under the bathroom light. For those craving a detailed roadmap, my favorite reference is A DIY Guide to Bathtub Refinishing, which mirrors the exact steps I took and offers troubleshooting tips for common hiccups.
Avoiding Common Pitfalls: Lessons from the Frontlines
Even with a solid plan, refinishing a tub can trip up the unwary, especially when it comes to moisture management and adhesion. One mistake I almost made was skipping the “wet‑test” on a hidden corner, which could have revealed lingering water that would later cause bubbling or peeling of the finish. I also learned that proper ventilation is not optional; inadequate airflow can trap volatile organic compounds, jeopardizing both health and the coating’s cure time. To stay ahead of these issues, I consulted the latest plumbing trends, which emphasized the importance of using water‑resistant primers and ensuring the tub’s drain is fully sealed during the curing phase. These insights saved me from costly rework and reinforced the value of thorough preparation.
Sustainability at the Heart of the Project
Refinishing isn’t just a budget‑friendly hack; it’s a conscious choice that aligns with a broader vision of responsible living. By opting for a low‑VOC epoxy, I reduced the emission of harmful chemicals while still achieving a glossy, durable finish that rivals brand‑new acrylic tubs. Moreover, the process kept the original tub in the landfill, diverting several hundred pounds of concrete, porcelain, and metal from waste streams—a tangible contribution to my home’s overall sustainability score. My journey mirrors the ethos shared in Transforming My Bathroom, where thoughtful material selection and waste reduction turned a simple remodel into a green triumph.
Cost Comparison: Refinishing vs. Full Replacement
When I tallied the expenses, the contrast between refinishing and buying a new tub was striking. The total outlay for sandpaper, respirator, epoxy, and a few rental tools hovered around a few hundred dollars, whereas a comparable new fixture—including removal, disposal, and installation—easily topped the thousand‑dollar mark. Beyond the raw numbers, refinishing also eliminated the hidden costs of demolition mess, potential floor damage, and the time lost to scheduling multiple contractors. In short, the financial savings translated directly into a faster, cleaner project that left more room in my budget for other sustainable upgrades, like low‑flow fixtures and reclaimed wood accents.
Maintaining Your Refreshed Tub: Simple Practices for Longevity
After the final coat cured, I adopted a maintenance routine that ensures the renewed surface stays pristine for years to come. First, I avoid abrasive cleaners; a pH‑neutral soap and soft sponge do the trick without scratching the finish. Second, I wipe the tub dry after each use to prevent water spots and mineral deposits from etching the epoxy. Finally, I schedule a gentle resealing touch‑up every two to three years, using a compatible clear sealant that reinforces the bond and restores the original shine. These habits require minimal effort but deliver maximal protection, keeping the tub looking showroom‑ready without the need for another major overhaul.
Final Reflections: The Joy of a Revived Tub
Standing in my bathroom now, the tub gleams with a fresh, glossy sheen that rivals any showroom model, yet it still carries the subtle patina of years gone by—a blend of old‑world charm and modern resilience. The project reinforced my belief that thoughtful DIY can bridge the gap between aesthetic aspirations and environmental responsibility, proving that you don’t need a massive budget to achieve a high‑impact transformation. If you’re hesitating over the cost or complexity of bathtub refinishing, let my experience serve as a roadmap: gather the right tools, follow a systematic process, respect the sustainability principles, and watch a tired fixture become the star of your sanctuary.

When it comes to the world of blogging and writing, Rose DesRochers is a name that stands out. Her passion for creating quality content and connecting with her audience has made her a trusted voice in the industry. Aside from her skills as a writer and blogger, Rose is also known for her compassionate nature.
Related Posts

Transform Your Bathroom: The Unexpected Power of Bathtub Refinishing
Explore why a simple bathtub refinishing can turn an outdated bathroom into a spa‑like retreat, bo... Read More
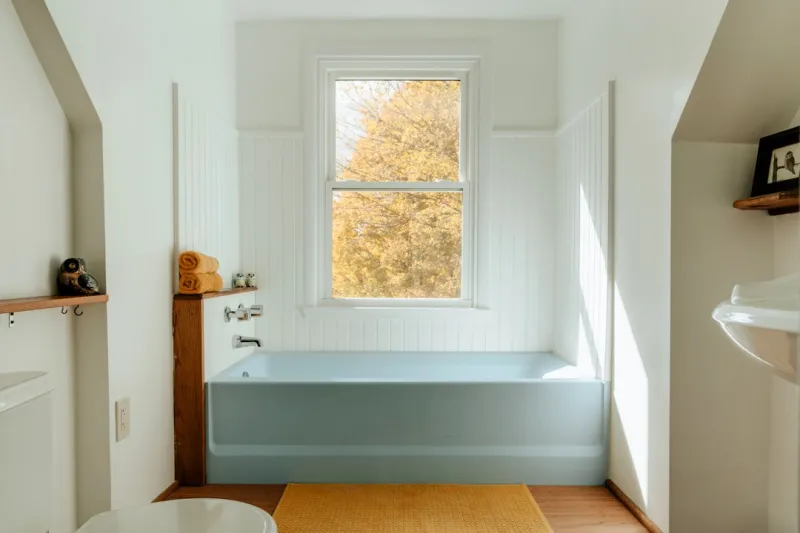
Bathtub Refinishing: A Sustainable Solution for a Fresh New Look
Bathtub refinishing is a sustainable solution for updating your bathroom without breaking the bank o... Read More

Revive Your Bathroom: The Insider’s Guide to Bathtub Refinishing
Learn why bathtub refinishing is the smart, eco‑friendly alternative to replacement, with a detail... Read More
Top Posts

The Intersection of Home Security and Sustainability: A New Era for Home Alarm Systems
The intersection of home security and sustainability is an exciting and rapidly evolving field. Learn how sustainable home alarm systems can provide enhanced se...Read More

Breathing New Life into Aging Homes: A Sustainable Restoration Playbook
A deep dive into holistic home restoration, blending reclaimed materials, nanocoated paints, and smart monitoring to protect heritage, improve sustainability, a...Read More
Beyond the Sheet: How Innovative Drywall Practices Are Redefining Interiors
A deep dive into modern drywall trends—from low‑VOC joint compounds and smart tools to moisture‑resistant boards and integrated tech—showing how to crea...Read More

Solar Energy’s Next Frontier: Turning Every Surface Into Power
Solar power is no longer limited to rooftop panels; innovative technologies like building‑integrated photovoltaics, solar‑powered smart home nodes, and comm...Read More
0 Comments
Post Comment
You will need to Login or Register to comment on this post!