
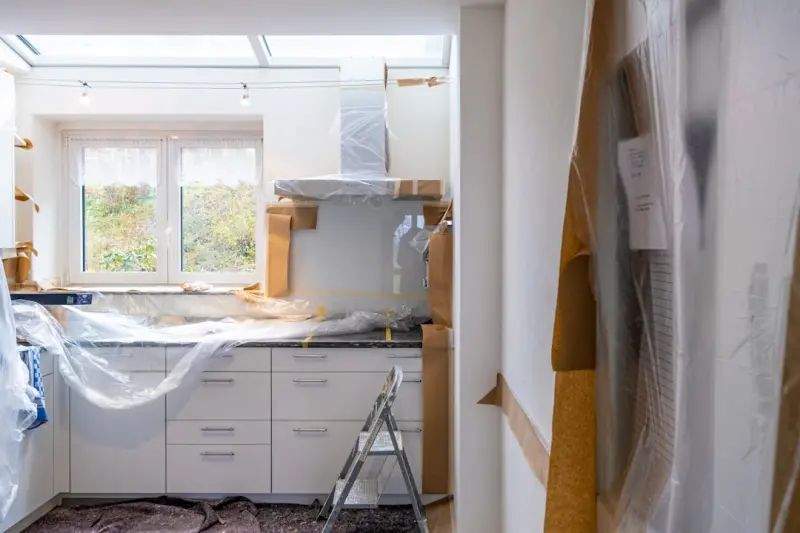
Renovating a space—whether it’s a boutique office, a heritage storefront, or a modern loft—can feel like juggling flaming torches while walking a tightrope. One missed detail can cascade into budget overruns, schedule delays, or even safety hazards. That’s why a granular, step‑by‑step checklist isn’t a luxury; it’s the backbone of any successful renovation.
1. Define the “Why” Before the “What”
Clarify the core objectives. Are you chasing higher tenant retention, improving energy efficiency, or simply refreshing aesthetics? Pinpointing the primary driver informs every downstream decision, from material selection to contractor vetting.
Write a concise renovation brief that includes:
- Key performance indicators (KPIs) such as reduced utility costs or increased foot traffic.
- Stakeholder expectations—what does the building owner, occupants, and facilities team each need?
- Non‑negotiables (e.g., maintaining historic façade, preserving existing load‑bearing walls).
2. Assemble a Real‑World Budget, Not a Wish List
Budgets are the most common casualty of “creative enthusiasm.” To keep finances on track:
- Start with a hard cost estimate—materials, labor, permits, and contingencies.
- Layer in soft costs like design fees, insurance, and temporary relocation expenses.
- Allocate a contingency buffer of 10‑15 % for the unknowns that inevitably surface.
Use a spreadsheet that can be updated in real time; this becomes your living financial dashboard.
3. Secure Every Permit Before Raising a Hammer
Skipping permits saves time on paper, but it can stall the entire project when inspections catch up. Create a permit matrix that lists:
- Local building codes relevant to structural changes.
- Fire safety and egress requirements.
- Accessibility compliance (ADA or local equivalents).
- Specialty permits—signage, outdoor structures, or historic preservation.
Assign a single point person—often the project manager or a seasoned architect—to shepherd each application through the municipal maze.
4. Conduct a Pre‑Renovation Condition Survey
Before demolition begins, document the existing state of the building. This includes:
- Photographic evidence of walls, ceilings, floors, and fixtures.
- Measurements of structural members and clearances.
- Utility maps (plumbing, electrical, HVAC).
A thorough survey protects you from “surprise” issues later and provides a baseline for quality assurance.
5. Integrate Systems Checks Early
Even if plumbing isn’t the headline of your renovation, a hidden leak can undo months of work. Leverage insights from proactive plumbing audits to schedule a pre‑renovation inspection. The audit can reveal:
- Corroded pipe sections that need replacement before walls go up.
- Pressure anomalies indicating potential future failures.
- Opportunities to upgrade to water‑saving fixtures that align with sustainability goals.
Addressing these items up‑front prevents costly re‑work and protects the integrity of new finishes.
6. Choose Materials With an Eye on Lifecycle
Every material tells a story about durability, maintenance, and environmental impact. When selecting finishes, ask:
- What is the expected lifespan under the intended use?
- How does the material perform in the local climate (humidity, temperature swings)?
- Is the product recyclable or sourced responsibly?
For example, opting for low‑VOC paints improves indoor air quality while reducing future remediation costs.
7. Plan for Moisture Management—Beyond the Obvious
Even if you’re not installing a new roof, moisture can infiltrate through gaps, poorly sealed joints, or aging membranes. A smart approach draws from the principles in green waterproofing—use breathable yet water‑resistant barriers that allow the building to “breathe” while keeping liquid out. Key steps include:
- Inspecting and repairing existing flashing around windows and doors.
- Applying a vapor‑permeable sealant to interior wall assemblies where appropriate.
- Ensuring proper drainage gradients in floor slabs and exterior grading.
8. Align Interior Finishes With Structural Realities
When it comes to walls and ceilings, the devil is in the detail. Modern drywall techniques can reduce waste and improve fire rating, but only if the framing is sound. Checklist items:
- Verify stud spacing and load‑bearing capacity before installing heavy wall panels.
- Confirm that insulation meets thermal and acoustic performance goals.
- Schedule a moisture barrier check in wet areas before hanging drywall.
9. Develop a Phased Timeline That Minimizes Disruption
Especially in occupied buildings, a staggered schedule keeps operations humming. Break the project into logical phases:
- Demolition & Hazard Removal – Isolate dust, asbestos, or lead hazards.
- Structural & Rough‑In Work – Frame walls, install new HVAC ducts, run electrical conduit.
- Enclosure & Moisture Control – Apply waterproofing, install sheathing, seal openings.
- Finishing & Fit‑Out – Hang drywall, paint, install fixtures, and do final trims.
- Commissioning & Handover – Test systems, conduct punch‑list walkthrough, and deliver documentation.
Each phase should have a defined “go/no‑go” checkpoint to verify that the prior work meets quality standards before proceeding.
10. Quality Assurance at Every Gate
Implement a simple yet rigorous QA protocol:
- Daily Log – Capture what was completed, any issues, and corrective actions.
- Mid‑Phase Inspections – Conduct third‑party checks after rough‑in and before finishing.
- Final Walk‑Through – Use a punch‑list template to verify every item against the original brief.
Documenting each step not only protects against disputes but also creates a knowledge base for future projects.
11. Communication Cadence With Stakeholders
Renovation projects thrive on transparent communication. Establish a cadence that includes:
- Weekly progress emails summarizing accomplishments, upcoming tasks, and any change orders.
- Bi‑weekly on‑site meetings with the contractor, architect, and owner’s representative.
- Real‑time updates via a shared project management platform (e.g., Trello, Asana).
When everyone knows the status, decision‑making speeds up and surprises shrink.
12. Safety Protocols That Go Beyond OSHA Minimums
Beyond mandatory safety signage, embed a culture of safety:
- Require daily toolbox talks that focus on the specific hazards of the day’s work.
- Provide easy access to PPE and ensure proper storage.
- Maintain a clear “no‑entry” zone for high‑risk activities like structural demolition.
A safe site reduces downtime from accidents and fosters a more motivated crew.
13. Sustainability Checks at the Finish Line
Before signing off, verify that the renovation meets any sustainability certifications you targeted (LEED, WELL, BREEAM). Key metrics include:
- Energy performance—confirm that new HVAC systems meet design load calculations.
- Indoor air quality—ensure low‑emission finishes and proper ventilation.
- Water efficiency—check that fixtures installed align with the water‑saving goals set in the brief.
14. Documentation & As‑Built Records
Post‑renovation, compile a comprehensive as‑built package:
- Updated floor plans and elevations reflecting any changes.
- Manufacturer data sheets for new equipment and finishes.
- Warranty information and maintenance schedules.
- Final inspection reports and occupancy permits.
Future facility managers will thank you for a clean, searchable record.
15. Post‑Occupancy Evaluation
The renovation isn’t truly complete until the space is lived in and measured against the original objectives. Schedule a follow‑up review 30‑60 days after occupancy to assess:
- Performance of new systems (energy use, water consumption).
- User satisfaction—collect feedback from occupants on comfort and functionality.
- Any teething problems that need minor adjustments.
Closing the loop transforms a one‑off project into a continuous improvement cycle.
By embedding these checkpoints into your renovation workflow, you transform a chaotic, high‑risk endeavor into a predictable, value‑driving process. The checklist isn’t just a list; it’s a strategic framework that aligns budget, schedule, quality, and stakeholder expectations—all while safeguarding the long‑term health of the building.

Paul Gray is a dynamic blogger based in Brampton, where he shares his life with his amazing wife, Sarah. Known for his engaging writing style and relatable insights, Paul has carved out a niche in the blogging world that resonates with readers from all walks of life. When he's not crafting captivating posts, you can find him savoring a cold beer or indulging in the latest blockbuster movie. With a friendly demeanor and a passion for storytelling, Paul brings a unique perspective to his work, making him not just a blogger, but a voice for those who appreciate the simple joys of life.
Related Posts
A Human‑Centric Renovation Checklist for the Hybrid Workplace
Discover a fresh renovation checklist that balances employee wellbeing, sustainability, and business... Read More

The Ultimate Renovation Checklist: A Sustainable Approach
Create a comprehensive renovation checklist to ensure a smooth and sustainable home upgrade. Learn h... Read More
The Ultimate Renovation Checklist: A Step-by-Step Guide
A comprehensive renovation checklist is essential to ensure that your project stays on track, within... Read More
Top Posts

Weather‑Smart Home Envelopes: Proven Strategies for Year‑Round Protection
A comprehensive guide to weather‑proofing your home, covering air tightness, water management, thermal continuity, and moisture control, with actionable steps...Read More

Self‑Healing Asphalt: Roads That Repair Themselves
Self‑healing asphalt uses microcapsules and polymer binders to automatically seal cracks, offering longer lifespan, lower maintenance costs, and environmental...Read More

The Trending Taps: A Lifan Chen Guide to Mastering Your Home's Plumbing
From preventing leaks to embracing smart home tech, Lifan Chen offers a comprehensive guide to understanding and maintaining your plumbing system. Learn practic...Read More
Reviving Brick: Modern Masonry Techniques for the Everyday Builder
Explore contemporary masonry strategies—materials, mortar mixes, thin veneer, and sustainable reclamation—to create lasting, stylish walls that bridge indoo...Read More
0 Comments
Post Comment
You will need to Login or Register to comment on this post!