
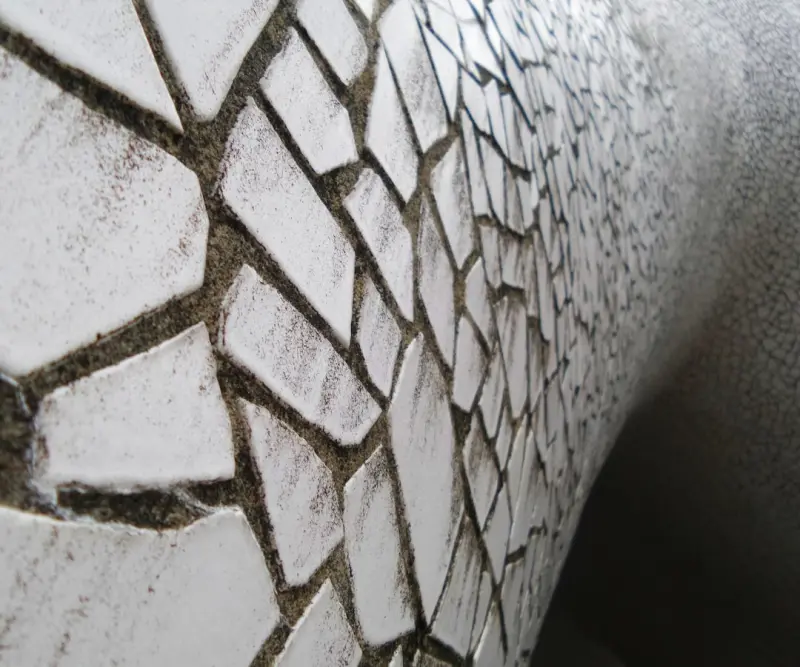
Why Upcycling Tiles Isn’t Just a Trend—It’s a Design Revolution
When I first walked into my grandma’s kitchen at age twelve, the linoleum was peeling, the cabinets were a tired teal, and the floor was a mismatched patchwork of broken ceramic pieces. Rather than calling a contractor, I grabbed a hammer, a bucket of grout, and a handful of “discarded” tiles from the back of a closet. The result was a surprisingly cohesive, speckled floor that still gets compliments today. That early experiment taught me a fundamental truth: imperfection can be the spark for creativity. Fast forward a few decades, and upcycling tiles has moved from basement‑project novelty to a respected, sustainable design strategy that homeowners and designers alike are embracing.
What Exactly Is Tile Upcycling?
Tile upcycling is the process of taking tiles that would normally be tossed—cracked shards, surplus samples, outdated patterns, or even tiles reclaimed from demolition sites—and transforming them into new, functional, or decorative elements. Unlike recycling, which often reduces materials back into raw components, upcycling preserves the tile’s visual identity while giving it a fresh purpose. Think of it as a second life for a ceramic that might otherwise become landfill waste.
Why It Matters: The Hidden Cost of Tile Waste
Every year, manufacturers ship millions of square meters of tile that never make it to a finished floor. Those “over‑produced” or “defective” units sit in warehouses, are shipped back, and ultimately end up in landfills. The environmental impact isn’t just the waste itself; the production of each tile consumes energy, water, and raw minerals. By redirecting even a fraction of that surplus into creative projects, we cut down on new material demand, reduce transportation emissions, and keep a beautiful piece of craftsmanship in use.
Getting Started: The Mindset Shift
Before you open that toolbox, change your mental inventory. Instead of seeing a cracked tile as a problem, view it as a design element waiting to be highlighted. This shift is the same principle behind the next‑gen tile innovations that blend form and function—only here the function is sustainability, and the form is your imagination.
Step‑by‑Step Guide to Upcycling Your Tiles
- Assess Your Stock. Gather all the tiles you have: broken pieces, leftover backs, or even old backsplashes. Lay them out on a clean surface and sort by color, texture, and size. You’ll be surprised how many complementary tones emerge when you spread them out.
- Choose a Project Scope. Beginners often start with a mosaic backsplash or a border accent. More ambitious creators might tackle an entire floor, a statement wall, or even a custom tabletop.
- Prep the Tiles. Clean each piece with a mild detergent to remove dust and adhesive residue. For heavily cracked tiles, use a hand‑held rotary tool or a small angle grinder to smooth sharp edges. Safety first—always wear eye protection.
- Design the Layout. Sketch your pattern on graph paper or use a digital design tool. Randomized “shatter” patterns can be striking, but consider a deliberate arrangement—like a gradient of blues or a chevron made from contrasting shards.
- Choose the Right Adhesive. For walls, a standard thin‑set mortar works well. For floors, especially where you’re mixing tile thicknesses, a polymer‑enhanced thin‑set provides the flexibility needed to accommodate uneven surfaces.
- Lay the Tiles. Start from the center of the area and work outward, ensuring each piece fits snugly. Use tile spacers if you want uniform grout lines; omit them for a “raw” look that emphasizes the irregularity of the pieces.
- Grout and Seal. Once the adhesive sets (usually 24 hours), apply a sanded or unsanded grout depending on the width of your joints. After the grout cures, seal both grout and tiles with a penetrating sealer to protect against moisture—especially crucial in wet rooms.
Creative Applications You Might Not Have Considered
1. Bathroom Backsplashes with Storytelling Tiles
Imagine a bathroom where each tile tells a chapter of your family’s history: a fragment from your mother’s vintage kitchen, a piece salvaged from a 1970s motel you stayed at on a road trip, and a splash of ceramic you collected at an art fair. Arranged in a linear sequence, the backsplash becomes a visual memoir, turning an ordinary wet wall into a conversation starter.
2. Outdoor Patios and Fire Pits
While many think ceramic tiles are strictly indoor, certain porcelain tiles are rated for outdoor use. By selecting weather‑resistant pieces and pairing them with a waterproofing subscription model for regular sealant upkeep, you can craft a durable, eye‑catching patio surface. The uneven surface also offers excellent traction—a safety bonus for households with children or pets.
3. Furniture Facelifts
Instead of discarding an old coffee table, replace its top with a collage of broken tiles. The mosaic not only adds visual interest but also creates a heat‑resistant surface perfect for placing hot mugs or candles. Seal the mosaic with a high‑gloss epoxy for a sleek finish that also protects against spills.
4. Acoustic Panels for Home Studios
If you have a music or podcast studio at home, you can embed upcycled tiles into acoustic panels. The irregular surface diffuses sound waves, reducing echo while the dense ceramic helps block low‑frequency noise. Combine this with soft backing material for an effective, aesthetically pleasing acoustic solution.
Balancing Aesthetics and Functionality
One of the biggest concerns with upcycled tiles is durability. Not all broken pieces are structurally sound. Conduct a simple “tap test”: gently tap the tile with a fingertip—if it feels hollow or gives way, discard it. For floor applications, prioritize larger, sturdier pieces to avoid uneven wear. Also, remember that grout lines can be a design asset; varying grout colors can accentuate the mosaic’s rhythm or make the pattern appear more cohesive.
Cost Savings—A Real Numbers Example
Let’s break down a typical kitchen backsplash project using brand‑new 12‑inch ceramic tiles:
- Tile cost: $2.50 per tile × 30 tiles = $75
- Adhesive and grout: $30
- Labor (if hired): $250
- Total: $355
Now compare that to a DIY upcycled project using 30 broken pieces sourced from a renovation:
- Tile cost: $0 (reclaimed)
- Adhesive and grout: $30 (same)
- Tools (grinder, safety gear): $40 (one‑time purchase)
- Labor: $0 (your time)
- Total: $70
The savings are evident—over 80% reduction in material expense. When you factor in the environmental payoff, the value proposition becomes even more compelling.
Integrating Technology Without Over‑Complicating
While upcycling is fundamentally low‑tech, you can still benefit from modern tools. For example, a laser level ensures a perfectly straight border when laying a mosaic around a countertop. Digital design apps let you preview patterns before committing to the layout, reducing waste from trial‑and‑error. However, remember the heart of the process is tactile—handling each piece, feeling its texture, and deciding where it belongs.
Common Pitfalls and How to Avoid Them
- Over‑looking Moisture Management. Especially in bathrooms, neglecting proper waterproofing can lead to tile delamination. Apply a liquid waterproofing membrane beneath the thin‑set, and consider a periodic sealant service—something a subscription‑based waterproofing plan can simplify.
- Ignoring Substrate Preparation. A dusty or uneven substrate will compromise adhesive bond. Clean, level, and prime the surface before laying your reclaimed tiles.
- Choosing Incompatible Grout. Sanded grout is ideal for joints wider than 1/8 inch; unsanded grout works best for narrow lines. Mixing the two in the same project can cause color inconsistencies.
- Skipping Sealing. Even “impervious” porcelain can absorb moisture over time, especially at the grout lines. A penetrating sealer extends the life of your work and protects against stains.
Showcase: Real‑World Upcycled Tile Projects
Below are three inspiring case studies that illustrate the range of possibilities.
Case Study 1 – Urban Loft Kitchen Island
A New York loft owner reclaimed 200 broken tiles from a demolished brownstone. The designer arranged them into a radial pattern emanating from the island’s center, using a bold navy grout to emphasize the concentric circles. The result: a striking focal point that ties together stainless steel appliances, reclaimed wood cabinets, and industrial lighting.
Case Study 2 – Coastal Bathroom Retreat
A seaside cottage featured a bathtub surround made from sea‑glass‑tinted tiles salvaged from an old surf shop. The mosaic mimics the ebb and flow of waves, creating a spa‑like ambience. The homeowner partnered with a local waterproofing crew for a subscription service to ensure the grout and sealer remain intact against the salty air.
Case Study 3 – Rural Barn Conversion
During a barn-to‑home conversion, a farmer collected shattered tiles from a neighboring grain silo. The large, rust‑colored shards formed a checkerboard floor in the new living room, juxtaposing the sleek modern furnishings. The uneven surface also helped reduce dust—an unexpected benefit for a home with livestock nearby.
Future‑Forward: Scaling Up the Upcycling Movement
Design schools are beginning to incorporate upcycling modules into their curricula, emphasizing resourcefulness alongside aesthetics. Manufacturers are also responding: some tile producers now offer “return‑and‑reuse” programs, where consumers can send back damaged tiles for a discount on future purchases. Imagine a marketplace where you trade your broken pieces for design consulting credits—an ecosystem that closes the loop on tile life cycles.
Take the First Step Today
If you’re standing in front of a box of cracked tiles feeling discouraged, remember: every crack is a potential design line, every missing piece is an opportunity for contrast. Gather your shards, sketch a bold pattern, and let the process guide you. The journey from breakage to beauty isn’t just about a finished surface; it’s about reclaiming the story behind each piece and turning it into a statement that says, “I value creativity, sustainability, and the charm of imperfection.”

Kelly Reynolds is a dynamic freelance writer hailing from the picturesque landscapes of Alberta. A master of the written word, she juggles her passion for storytelling with the exhilarating chaos of being a mother to five spirited children. With an impressive portfolio that spans various genres, Kelly captivates readers through her engaging blog posts and thought-provoking articles.
Related Posts
Adaptive Tile Solutions for Agile Workspaces
Adaptive tile systems turn flooring into a flexible, data‑rich platform that supports sustainabili... Read More
How Tile Choices Shape the Vibe and Performance of Your Workspace
A deep dive into how tile patterns, sustainable materials, and data‑driven maintenance can elevate... Read More
When Tiles Talk: Turning Flooring into a Data Hub
A deep dive into intelligent tiling shows how embedded sensors, acoustic design, and recycled materi... Read More
Top Posts
Plastering: The Unsung Hero of Modern Interiors
Plastering isn’t just a finish—it’s a design tool. I share how to choose the right mix, master the technique, and turn ordinary walls into statement surfa...Read More
Eco‑Smart Bathtub Refinishing: A Sustainable Makeover for Modern Homes
A sustainable bathtub refinishing guide that reduces energy use, improves safety, and adds resale value—perfect for eco‑conscious homeowners seeking a green...Read More
Silent Water Intruders: Mastering Hidden Leak Detection for a Healthy Home
Learn how to detect invisible leaks before they cause damage. From acoustic listening devices to smart sensors and pressure testing, Paul Gray shares pro tips t...Read More
Tile Mastery: From Subfloor Secrets to Future‑Proof Design
Learn insider tips on preparing subfloors, choosing durable tiles, mastering grout, and adding smart features to create a timeless, future‑ready tiled space....Read More
0 Comments
Post Comment
You will need to Login or Register to comment on this post!