

Why Mold Removal Is No Longer a One‑Time Fix
When I first started handling mold issues for commercial clients, I treated each case like a stubborn stain – scrub, disinfect, and call it a day. Over time, I realized that mold is more like a silent alarm system, constantly probing for the slightest moisture imbalance. In today’s high‑performance work environments, the stakes are higher: a hidden colony can erode indoor air quality, trigger health complaints, and even jeopardize certifications such as LEED or WELL. This post is my playbook for shifting mold removal from a reactive cleanup to a proactive, data‑driven strategy that protects people, property, and productivity.
The Hidden Economics of Ignoring Mold
Most facility managers underestimate the financial ripple effect of mold. Beyond the obvious remediation costs, there’s a cascade of hidden expenses:
- Reduced employee performance: Studies show that exposure to mold spores can cause fatigue, headaches, and reduced concentration.
- Higher HVAC energy use: Mold‑laden ducts restrict airflow, forcing fans to work harder.
- Insurance premium hikes: Repeated claims for water damage and mold can push insurers to raise rates.
- Lost tenant confidence: In multi‑tenant buildings, one contaminated suite can scare off potential renters.
Understanding these downstream costs reframes mold removal as an investment, not an expense.
Step 1: Map Moisture Sources Before You Scrub
The mantra “mold loves moisture” is true, but the reality is more nuanced. Moisture can be hidden in three primary zones:
- Condensation zones – where warm indoor air meets cool surfaces, like concrete walls or metal ductwork.
- Leakage zones – from roof penetrations, plumbing joints, or faulty glazing.
- Capillary zones – where water climbs through porous building materials, often unseen behind finishes.
Before any chemical treatment, conduct a thermal imaging sweep and install relative humidity (RH) sensors in suspected hotspots. The data will reveal patterns that visual inspections miss.
Step 2: Leverage Smart Building Tech for Early Detection
Modern facilities already host a network of IoT devices monitoring temperature, occupancy, and CO₂. Adding a smart insulation sensor suite can give you real‑time RH alerts. When RH climbs above 60 % for more than 48 hours, the system flags the zone, sends a push notification, and logs the event for trend analysis.
Integrating these alerts with your Building Management System (BMS) enables automated mitigation:
- Trigger localized dehumidifiers.
- Adjust HVAC setpoints to reduce surface condensation.
- Schedule a maintenance crew for a visual inspection before mold spores take hold.
This predictive loop reduces the need for emergency remediation, turning mold removal into a scheduled maintenance item.
Step 3: Choose the Right Cleaning Method for the Substrate
Not all surfaces respond to the same treatment. Here’s a quick reference:
| Substrate | Preferred Method | Key Considerations |
|---|---|---|
| Gypsum wallboard | HEPA‑vacuum + biocide‑treated detergent | Avoid over‑wetting; wallboard can absorb moisture. |
| Concrete floors | Dry‑ice blasting + antifungal sealant | Penetrates pores; prevents future capillary rise. |
| Carpet & upholstery | Smart carpet cleaning with encapsulation chemistry | Extract moisture quickly; use HEPA filtration. |
| Metal ductwork | Foam‑based antimicrobial coating | Coating must be HVAC‑rated to maintain airflow. |
Choosing the right approach not only eradicates existing mold but also minimizes damage to the underlying material, saving you replacement costs.
Step 4: Seal, Insulate, and Ventilate – The Triple‑Guard
After the spores are gone, the next battle is prevention. Think of sealing, insulating, and ventilating as a three‑layered shield.
Seal
Identify every crack, joint, and penetrations point. Use silicone‑based sealants for flexible connections and polyurethane foam for larger gaps. Pay special attention to:
- Window‑frame interfaces.
- Utility chases that run through exterior walls.
- Roof‑to‑wall flashings – a perfect segue for a quick read on Rethinking Roofs.
Insulate
Proper insulation keeps interior surfaces from reaching the dew point. Closed‑cell spray foam is an excellent vapor barrier, but in retrofit projects, rigid mineral wool offers fire resistance and breathability.
Ventilate
Effective ventilation removes humid air before it condenses. Install energy‑recovery ventilators (ERVs) in high‑traffic zones, and ensure that exhaust fans in restrooms and kitchens are properly sized and maintained.
Step 5: Establish a Mold‑Ready Maintenance Calendar
Proactive mold control is a habit, not a one‑off project. Here’s a sample quarterly calendar:
- Q1: Review sensor logs, calibrate RH thresholds, and conduct a visual walkthrough of condensation zones.
- Q2: Perform a deep cleaning of HVAC coils using antimicrobial agents; replace any worn filters.
- Q3: Inspect roof flashings, skylights, and exterior wall penetrations for seal integrity.
- Q4: Run a thermal imaging audit to catch hidden moisture before winter freezes.
Document each task in a centralized log that ties back to your BMS alerts. This creates an audit trail for compliance auditors and helps demonstrate due diligence.
Step 6: Train Your Front‑Line Staff on Early Signs
Even the most sophisticated sensor network can miss a localized leak if it’s not reported promptly. Empower facility technicians, janitorial crews, and even employees with a quick “mold awareness” cheat sheet:
- Musty odor that intensifies in humid weather.
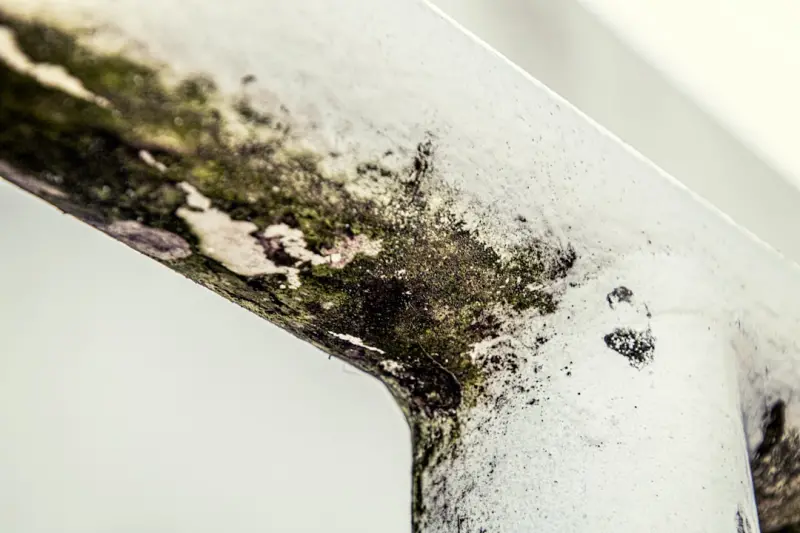
- Visible discoloration on walls, ceilings, or floor finishes.
- Water stains that don’t dry quickly.
- Unexpected spikes in HVAC energy consumption.
Encourage a culture where “I noticed a wet spot” is treated as a critical incident, not a minor observation.
Step 7: Document, Communicate, and Iterate
Transparency builds trust. After each remediation, produce a concise report that includes:
- Location and extent of mold (in square feet).
- Materials affected and remediation methods used.
- Pre‑ and post‑remediation RH readings.
- Recommendations for future prevention.
Share the report with building occupants, especially if the area is high‑traffic. Open communication reduces rumors and demonstrates a commitment to a healthy environment.
Case Study: Turning a Leaky Atrium into a Mold‑Free Collaboration Hub
One of our recent projects involved a 10,000‑sq‑ft atrium in a tech‑startup campus. The space featured a glass façade and an ambitious indoor garden. After a heavy rain season, occupants complained of a “musty” smell and occasional coughing fits.
Our approach:
- Installed RH sensors at the roof‑wall junction and the garden’s irrigation line.
- Detected a 72 % RH spike for 72 hours after rain, pinpointing a faulty flashing seal.
- Performed a targeted dry‑ice blast on the concrete slab, followed by an antifungal sealant.
- Re‑sealed the flashing, added an ERV to the atrium, and upgraded the plant irrigation to a drip system with a moisture sensor.
Within a month, the indoor air quality metrics improved by 35 %, and the startup reported a measurable boost in employee satisfaction. The key takeaway? A single, data‑driven intervention can transform a health liability into a productivity asset.
Future‑Proofing: Integrating Mold Management into Smart Building Platforms
As buildings become more autonomous, mold management will be a native feature of the smart ecosystem. Imagine a dashboard that not only shows temperature and occupancy but also:
- Predicts mold risk based on weather forecasts and interior humidity trends.
- Schedules automatic dehumidifier activation when thresholds are breached.
- Generates a “Mold‑Risk Score” for each zone, allowing facilities to prioritize investments.
When you align your mold strategy with the broader smart‑building roadmap, you create synergies that reduce energy waste, improve occupant health, and safeguard your asset value.
Final Checklist – Your Mold‑Ready Blueprint
- Deploy RH sensors in condensation, leakage, and capillary zones.
- Integrate alerts with the BMS for automated mitigation.
- Choose substrate‑appropriate cleaning methods; consider smart carpet cleaning for soft furnishings.
- Seal all penetrations, upgrade insulation, and ensure proper ventilation.
- Implement a quarterly maintenance calendar with clear responsibilities.
- Train staff on early detection signs and reporting protocols.
- Document every remediation, share findings, and refine the process.
By treating mold removal as a continuous, data‑informed practice, you protect not just the building’s skin but the people who thrive inside it. The payoff? Healthier occupants, lower operating costs, and a resilient, future‑ready workplace.

Kelly Reynolds is a dynamic freelance writer hailing from the picturesque landscapes of Alberta. A master of the written word, she juggles her passion for storytelling with the exhilarating chaos of being a mother to five spirited children. With an impressive portfolio that spans various genres, Kelly captivates readers through her engaging blog posts and thought-provoking articles.
Related Posts

Predictive Mold Removal: Turning Data Into a Clean, Healthy Building
A fresh look at mold removal shows how continuous humidity monitoring, smart ventilation, and AI-pow... Read More
Mold Removal Mastery: A Pro’s Playbook for Healthy Spaces
A seasoned facilities expert shares a step‑by‑step playbook for diagnosing, eradicating, and pre... Read More
Mold Removal Mastery: Detect, Eradicate, and Prevent Hidden Growth
Learn how to detect unseen mold, execute a thorough removal, and use smart tech to prevent future in... Read More
Top Posts

Flooring Futures: Materials That Boost Comfort, Style, and Sustainability
A fresh look at flooring choices that prioritize health, sustainability, and style, offering practical advice on materials, acoustics, pet‑friendly options, a...Read More

Seasonal Sheds: Crafting a Year‑Round Outdoor Sanctuary
Learn to reinvent your backyard shed as a year‑round sanctuary, blending eco‑friendly materials, flexible layouts, and smart water management for lasting co...Read More

Renovation Checklist: A Blueprint for Stress‑Free Transformations
A practical, stress‑free renovation checklist that guides homeowners through planning, budgeting, and execution, ensuring smooth transformations without surpr...Read More

Unlocking Speed and Savings: How Digital Permits Are Reshaping Construction Projects
Construction permits are evolving from a bottleneck into a strategic asset. This post explores AI‑powered compliance checks, digital twins, and seamless SaaS ...Read More
0 Comments
Post Comment
You will need to Login or Register to comment on this post!