
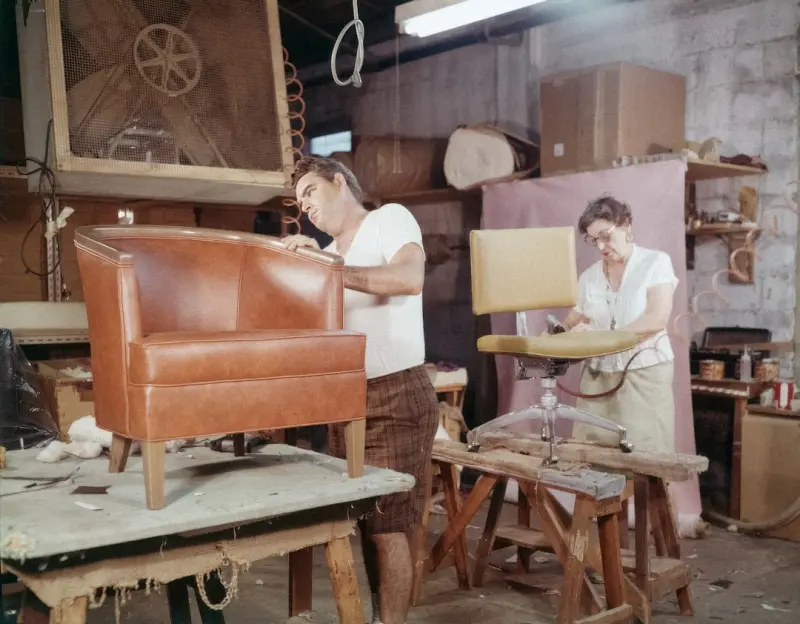
Why Furniture Restoration Deserves a Spot in Your Modern Design Playbook
There’s a quiet rebellion happening in living rooms, dining halls, and home offices. Instead of reaching for the latest mass‑produced sofa or coffee table, design‑savvy homeowners are turning to the pieces that have already earned a place in their family story. Furniture restoration isn’t just a hobby; it’s a strategic design decision that blends sustainability, craftsmanship, and personal narrative into a single, functional work of art.
The Hidden Value of a Well‑Chosen Piece
Every piece of furniture carries a set of latent attributes—material quality, construction technique, and an invisible line of provenance. When you spot a mid‑century walnut sideboard with a chipped veneer, you’re looking at a canvas with a built‑in structural integrity that modern knock‑offs often lack. Restoring that sideboard not only salvages an object with superior durability, but also infuses your space with a story that mass‑produced items simply cannot replicate.
Step‑One: Diagnosis—Reading the Body Language of Wood
Before you dive into sanding, staining, or re‑upholstering, you need to “listen” to the piece. Look for signs of structural fatigue (loose mortise‑and‑tenon joints, warped legs), surface blemishes (cracks, water stains), and hidden hazards (lead‑based paint, asbestos‑laden insulation in older upholstery). A simple moisture meter can tell you whether the wood has absorbed excess humidity, which is critical for selecting the right finish.
When you identify a piece that’s fundamentally sound but cosmetically tired, you’ve found a restoration candidate with the highest return on effort.
Step‑Two: Planning the Material Palette
One of the most rewarding aspects of restoration is the opportunity to blend old and new materials in a way that feels intentional rather than forced. Here are three fresh material pairings that are gaining traction:
- Reclaimed timber inserts with modern epoxy resin: Use thin strips of salvaged barn wood to patch gaps, then seal them with a clear, UV‑stable epoxy that highlights the grain.
- Eco‑friendly bio‑based polyurethane: This low‑VOC finish offers the durability of traditional polyurethane while keeping indoor air quality pristine.
- Organic, plant‑based fabric for upholstery: Materials such as hemp, linen, or Tencel provide a tactile experience and are biodegradable at the end of their life.
Choosing these materials aligns your restoration with broader sustainability goals without sacrificing performance.
Step‑Three: Integrating Technology—A Subtle Edge
While the core of restoration is hands‑on craftsmanship, a few low‑key tech tools can dramatically improve precision and consistency. A laser distance measurer ensures you cut replacement panels to exact dimensions, while a digital colorimeter helps you match stains to the original wood tone, eliminating the guesswork of eye‑based color selection.
For those who love a little digital assistance, consider exploring AR‑enhanced repair platforms. These apps overlay virtual guides onto the physical piece, showing you where joints need reinforcement or where glue should be applied, turning a potentially intimidating project into a step‑by‑step visual journey.
Step‑Four: The Restoration Workflow—From Prep to Finish
1. Disassembly & Documentation
Take high‑resolution photos of every angle before you begin. Label each component (e.g., “Drawer Front A”) with removable tags. This documentation becomes your roadmap during reassembly and ensures you don’t lose any small hardware.
2. Cleaning & De‑gumming
Use a gentle citrus‑based solvent to remove old finishes, waxes, or glues. For stubborn lead‑based paints, a certified lead removal kit is essential for safety. After stripping, wipe the surface with a tack cloth to capture dust.
3. Structural Repairs
Replace broken dowels with new hardwood dowels, glue joints with a high‑strength wood adhesive, and reinforce any compromised mortise‑and‑tenon connections with stainless steel brackets hidden inside the wood. When you need a new piece of wood, source it from sustainably harvested lumber that matches the grain direction of the original piece.
4. Surface Preparation
Sand progressively with 120, 180, and finally 220‑grit sandpaper, always sanding with the grain. Finish the sanding with a fine synthetic pad to create a glass‑like surface ready for stain.
5. Staining & Finishing
Apply a stain using a lint‑free cloth, allowing each coat to penetrate for the recommended time before wiping off excess. Follow with a low‑VOC, bio‑based polyurethane applied with a high‑quality brush or foam roller. Two to three coats, with light sanding between layers, will produce a durable, hand‑lovable finish.
6. Re‑upholstering (if applicable)
Remove old fabric carefully, noting staple placement. Replace with your chosen eco‑friendly fabric, using a pneumatic stapler for consistent pressure. Add a thin layer of high‑density foam for comfort, and consider a removable cushion cover for easy cleaning.
7. Reassembly & Final Touches
Re‑attach all hardware, ensuring hinges and drawer slides operate smoothly. Apply a final dusting of wax or oil to protect the finish and enhance the depth of the wood grain.
Beyond the Table: Leveraging Restored Furniture as Design Anchors
Once your piece is revived, think about how it can become a focal point rather than just another item. Here are three strategic placement ideas:
- Contrast Pairing: Pair a reclaimed walnut sideboard with sleek, powder‑coated metal shelving to highlight the warmth of the wood against a cool, contemporary backdrop.
- Layered Functionality: Transform a restored antique chest into a hybrid storage‑and‑seating unit by adding a custom cushion top, creating a dual‑purpose element for small apartments.
- Storytelling Gallery: Group several restored items—each from a different era—on a single wall to create a visual timeline that sparks conversation.
Monetizing Your Restoration Skills
Many homeowners discover a side income stream by offering restoration services to friends, neighbors, or local boutiques. A simple portfolio website featuring before‑and‑after photos, combined with a transparent pricing structure (e.g., $75 per hour for labor plus material costs), can attract clients seeking sustainable alternatives to buying new furniture.
Consider offering “restoration workshops” where participants bring a piece and learn the fundamentals under your guidance. This not only generates revenue but also builds a community of like‑minded creators who champion the reuse movement.
Future‑Proofing Your Restored Pieces
To ensure your restored furniture remains relevant for years to come, embed adaptability into the design. For example, install modular hardware that allows drawers to be reconfigured, or use interchangeable cushion covers that can be swapped to match evolving interior palettes. By thinking ahead, you turn a single restoration project into a long‑term design asset.
Conclusion: Restoration as a Manifesto
Furniture restoration is more than a DIY project; it’s a manifesto that says you value quality, sustainability, and narrative over disposable convenience. By approaching each piece with a blend of traditional craftsmanship and selective modern tools, you create functional art that tells a story—your story.

William Roy is a freelance writer originally from Montreal who moved to Ottawa with his wife of 50 years to be closer to their grandkids. Alongside his writing, William has a passion for fishing.
Related Posts

Reviving Forgotten Furniture: A Hands‑On Guide
A hands‑on journey into furniture restoration, covering assessment, repair, finishing, and sustain... Read More

Breathing New Life into Vintage Furniture: A Hands‑On Journey
Explore a step‑by‑step restoration process that blends history, sustainability, and modern desig... Read More

Restoring Furniture: The Unexpected Catalyst for Workplace Innovation
Restoring old desks and chairs isn’t just a design choice—it’s a powerful cultural lever. Lear... Read More
Top Posts

When Buildings Learn to Breathe: The Rise of Adaptive Facades
Adaptive façades turn static walls into living skins, using smart glass, kinetic louvers, and responsive materials to boost energy efficiency, occupant comfort...Read More

Adaptive Architecture: Designing Buildings That Respond, Evolve, and Thrive
Discover the future of architecture where façades move, materials self‑adjust, and AI guides design, creating buildings that actively respond to occupants an...Read More
The Importance of General Contracting in Home Restoration
General contracting plays a vital role in home restoration, encompassing a wide range of services that help homeowners achieve their renovation goals. Learn mor...Read More

The Smart Home Advantage of Radiant Floor Heating
Explore why radiant floor heating is the perfect complement to a smart home, delivering energy savings, health perks, design flexibility, and a pathway to green...Read More
0 Comments
Post Comment
You will need to Login or Register to comment on this post!