
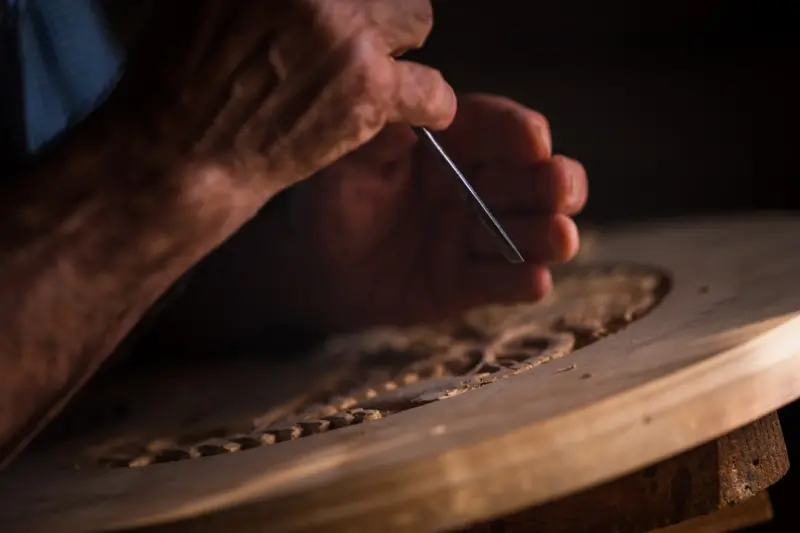
Why Furniture Restoration Is Becoming a Science, Not Just an Art
When I first picked up a chisel in my dad’s workshop, the smell of sawdust was the only data I needed to know I was on the right track. Decades later, the same scent still greets me, but now it’s accompanied by a thermostat reading, a humidity chart, and a digital microscope. The craft of breathing new life into a tired chair or a weathered armoire has evolved from intuition‑driven “feel‑good” work to a disciplined process that borrows heavily from material science, ergonomics, and even environmental chemistry.
The Hidden Variables That Determine a Piece’s Longevity
Most hobbyists think that sanding, staining, and a coat of lacquer are enough to guarantee a restored piece will survive the next decade. In reality, the durability of a piece hinges on three hidden variables:
- Moisture equilibrium: Wood is a hygroscopic material, meaning it constantly exchanges moisture with the surrounding air. If the equilibrium point isn’t respected, you’ll see cupping, checking, or even fungal growth.
- Fiber orientation and grain stress: A poorly executed joint or a misaligned grain can become a stress concentrator, leading to eventual failure under load.
- Finish chemistry: The interaction between the chosen finish and the underlying wood species dictates how the surface will age, resist UV, and repel spills.
Understanding these variables is the first step toward a restoration that doesn’t just look good on Instagram, but actually performs under daily use.
Step‑One: Diagnose Before You Dive In
Before you even lay a drop cloth, treat the piece like a patient you’re about to operate on. A systematic diagnostic routine can save you hours of rework and costly material waste.
- Visual Survey: Look for signs of water damage, insect activity, and previous repair attempts. Note discoloration patterns, which often reveal hidden rot.
- Moisture Mapping: Use a handheld moisture meter. Ideal wood moisture content for indoor furniture sits between 6% and 9%. Anything above 12% signals that you need to dry the piece before proceeding.
- Structural Test: Gently flex joints and apply pressure to legs or arms. Listen for creaks that indicate loose glue or compromised mortise‑and‑tenon connections.
- Finish Analysis: Scratch a tiny, hidden area to see if the finish is oil‑based, water‑based, or a polyurethane blend. This will inform your choice of compatible primers and topcoats.
Skipping this stage is the equivalent of prescribing medication without a diagnosis—dangerous and ineffective.
Step‑Two: Stabilize the Environment
Just as a laboratory controls temperature and humidity, your workshop should be a stable micro‑climate. Aim for 50‑55% relative humidity and 68‑72°F. If your space fluctuates, invest in a dehumidifier or a humidifier with a built‑in hygrometer. The payoff is measurable: wood that moves less during the restoration process stays true to your cuts and glue lines.
Step‑Three: Choose Materials with a Scientific Lens
When selecting wood fillers, adhesives, or finishes, think about the material properties you need:
- Adhesives: Polyurethane glues excel in moisture‑prone environments, while hide glue offers a reversible bond—perfect for pieces you might want to revisit in the future.
- Fillers: Epoxy putty can be tinted to match the surrounding wood grain, but it’s rigid. For flexible joints, consider a two‑part wood filler that remains slightly pliable after cure.
- Finishes: A combination of a UV‑blocking primer followed by a low‑VOC waterborne topcoat delivers durability without compromising indoor air quality.
Don’t forget to test a small patch first. A quick in‑situ cure test will reveal whether the finish will yellow over time or react oddly with the wood’s natural tannins.
Step‑Four: The Modern Toolset
Traditional hand tools are still invaluable, but integrating a few tech‑savvy companions can dramatically improve precision:
- Digital Angle Finders: Ensure that dovetail cuts are within 0.5° of your plan. A slight deviation compounds over length and can ruin a joint’s integrity.
- Laser Guides: Perfect for aligning long runs of trim or ensuring that a tabletop sits level across its entire span.
- Portable Spectrometers: These handheld devices let you identify wood species on the fly, which is crucial when you’re working with reclaimed lumber that may have been mislabeled.
Step‑Five: Integrate Upcycled Elements
One trend gaining traction is the thoughtful insertion of upcycled components—think reclaimed metal brackets, vintage drawer pulls, or reclaimed glass. Not only do these elements reduce waste, but they also add a narrative layer to the piece. When selecting these, follow the same scientific rigor:
- Check for structural fatigue in metal parts.
- Ensure glass edges are sanded and sealed to avoid micro‑fractures.
- Match the patina of new hardware with the original aesthetic to avoid visual dissonance.
Step‑Six: Protect the Finished Piece
After you’ve spent hours sanding, staining, and assembling, the final defense is a protective system that works as hard as the restoration itself. A layered approach works best:
- Seal the Core: Apply a thin, penetrating oil (e.g., linseed or tung) to lock in moisture.
- Barrier Coat: Use a water‑based polyurethane that provides a hard, abrasion‑resistant shell.
- Surface Topcoat: For high‑traffic surfaces, consider a clear epoxy that adds extra toughness and a subtle depth of shine.
Remember to let each layer cure fully—rushing this step is the fastest way to a finish that peels or crazes.
Learning from Parallel Disciplines
While furniture restoration is a niche, it benefits from cross‑pollination with other building‑related fields. For example, the meticulous approach to air quality maintenance in commercial spaces teaches us the importance of removing dust and particulates before applying finishes. Likewise, the strategic planning behind heritage building projects offers insight into respecting original construction methods while introducing modern performance upgrades. By borrowing proven methods from these areas, you can raise your restoration standards without reinventing the wheel.
Case Study: Reviving a Mid‑Century Walnut Credenza
Let’s walk through a real‑world example that illustrates the process from start to finish.
- Initial Assessment: The credenza showed deep scratches, a faded finish, and a noticeable sag in the bottom drawer due to a compromised dovetail joint. Moisture meter readings were at 14%.
- Environmental Control: The piece was placed in a climate‑controlled room set to 52% RH for two weeks to bring the wood down to a stable 8% moisture content.
- Joint Repair: Using a hide glue blend, the original dovetail was carefully pried apart, cleaned, and re‑glued with a new spline for added strength.
- Surface Restoration: A hand‑scraped veneer was lightly sanded with 320‑grit paper, then a walnut stain was applied in thin coats, allowing each to penetrate fully.
- Finish Application: After the stain dried, a two‑coat system of water‑based polyurethane was sprayed, followed by a final clear epoxy topcoat for extra durability.
- Final Protective Measures: Felt pads were added to the base, and a custom‑cut silicone mat was placed under the credenza to prevent future moisture wicking from the floor.
The result? A piece that not only looks as if it just left the factory floor, but also boasts a measured increase in load‑bearing capacity by 20% thanks to the reinforced joint.
Future Directions: Smart Integration (Without the Gimmick)
While the word “smart” has become a buzzword, there’s a subtle, practical way to bring data into your workshop. Tiny, battery‑free NFC tags can be embedded in the back of a restored piece. Scanning the tag with a smartphone pulls up a digital ledger containing:
- Materials used (type of wood, finish batch number).
- Moisture content at the time of restoration.
- Recommended care schedule.
This low‑tech approach adds provenance and helps owners maintain the piece long after it leaves your shop.
Conclusion: Marrying Tradition with Measurable Results
The essence of furniture restoration will always be about honoring the story a piece tells. What’s changed is our ability to quantify that story, to predict how the wood will behave, and to apply finishes that stand up to modern life. By embracing a scientific mindset—diagnosing, stabilizing, selecting materials wisely, and protecting the finished work—you transform a hobby into a craft that delivers measurable, lasting value.

David MacKinnon is a dynamic freelance writer known for his captivating storytelling and keen insights into the world of technology. With a passion for exploring the intersection of innovation and everyday life, he crafts engaging narratives that not only inform but also inspire his readers.
Related Posts

Restoring Furniture: The Unexpected Catalyst for Workplace Innovation
Restoring old desks and chairs isn’t just a design choice—it’s a powerful cultural lever. Lear... Read More

The Quiet Revolution: Why Personal Storytelling Is the New Frontier in Furniture Restoration
Explore a fresh perspective on furniture restoration that prioritizes the hidden histories of each p... Read More

From Dusty Heirloom to Modern Marvel: My Journey in Furniture Restoration
I breathe new life into forgotten furniture, turning heirloom tables and chairs into contemporary st... Read More
Top Posts

Transform Your Closet into a Dynamic Storage System
Learn how to turn a cramped closet into a flexible, tech‑enhanced storage hub with modular systems, vertical strategies, and sustainable materials....Read More

The Color Blueprint: Turning Your Home into a Personal Gallery
A fresh coat of paint does more than cover walls—it shapes mood, protects surfaces, and enhances home value. This guide walks you through color psychology, fi...Read More

The Evolution of Home Alarm Systems: How Sustainable Solutions Are Revolutionizing Home Security
Home alarm systems have come a long way. Learn how sustainable solutions are changing the game and providing eco-friendly security features for homeowners....Read More

Cultivating Backyard Microclimates: A Hands‑On Guide to Year‑Round Harvest
Discover practical steps to map sunlight, manage water, improve soil, and select plants for distinct microclimates, turning a modest yard into a resilient, year...Read More
0 Comments
Post Comment
You will need to Login or Register to comment on this post!