
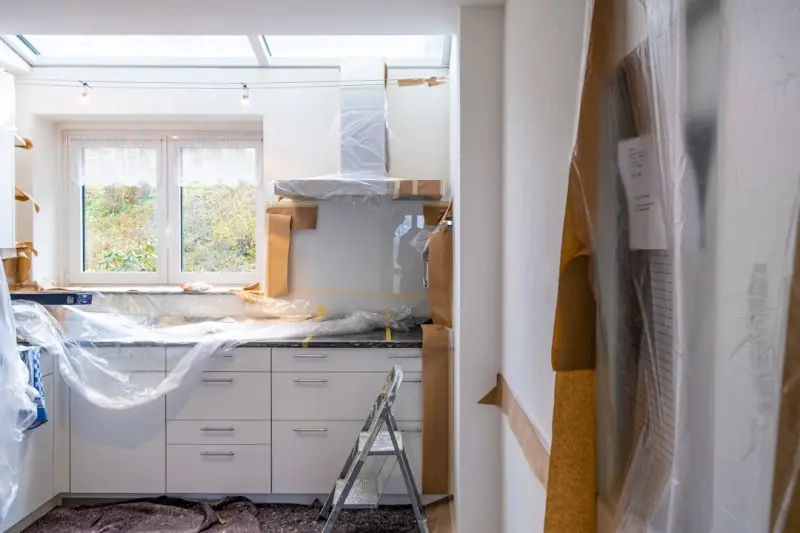
When I first walked onto a half‑finished living room with exposed studs and a half‑installed smart thermostat, I realized there’s a universal gap in most renovation projects: the lack of a master checklist that marries flexibility, technology, and long‑term wellness. Too often we focus on a single room’s aesthetic and forget that the home is a living system that must evolve with its occupants. Below is the checklist I’ve refined over a dozen large‑scale remodels, aimed at homeowners who want a future‑ready space that pays dividends in comfort, resale value, and adaptability.
1. Define the “Future‑Fit” Vision
Before you order any tile, start with a vision workshop. Ask yourself and your family:
- Who will use this space? Kids, aging parents, remote workers, or frequent guests?
- What activities might emerge? A home office today could become a hobby studio tomorrow.
- What tech trends are you comfortable adopting? Voice‑controlled lighting, occupancy sensors, or integrated health monitors?
Document these answers in a simple one‑page “Future‑Fit Brief.” This becomes the North Star for every subsequent decision.
2. Conduct a Holistic Baseline Audit
Most homeowners skip a thorough audit, assuming the home’s existing systems are “good enough.” I recommend a baseline audit that covers:
- Electrical load capacity – ensure the panel can handle additional circuits for smart devices.
- HVAC zoning – identify if your current system can be divided into independent zones for precise control.
- Structural flexibility – check if walls are load‑bearing before planning any demountable partitions.
- Indoor air quality – map out ventilation rates and look for potential moisture traps.
For a deeper dive into predictive audits, see the Predictive Audits guide.
3. Budget for Flexibility, Not Just Finish
Flexibility isn’t cheap, but it’s an investment. Allocate budget percentages as follows:
- Core construction (walls, framing, rough‑ins): 40%
- Adaptive systems (modular partitions, raised floors, wiring conduits): 20%
- Technology integration (smart hubs, sensors, networking): 15%
- Finishes (paint, flooring, fixtures): 20%
- Contingency for unforeseen adjustments: 5%
Remember, the goal is to spend a little more now to avoid costly retrofits later.
4. Secure the Right Permits Early
Permitting is a silent killer of timelines. The key is to file for the “most inclusive” scope from the start:
- Structural changes – even if you plan a removable partition, the permit ensures it meets code.
- Electrical upgrades – any increase in amperage or new circuits must be approved.
- Plumbing alterations – especially if you’re adding wet bars or secondary water lines.
- Mechanical modifications – new HVAC zones often require a mechanical permit.
Working with a licensed contractor who knows the local jurisdiction can shave weeks off the approval process.
5. Plan the Infrastructure Grid
Think of your home as a data center. The backbone—electrical, data, and plumbing—should be laid out before any finishes.
- Electrical conduit loops: Install conduit loops in ceilings and walls so future devices can be dropped in without cutting drywall.
- Ethernet backbone: Run Cat‑6a or higher cabling to each room, not just the office, to future‑proof against bandwidth spikes.
- Plumbing manifolds: Use a manifold system that allows you to add or shut off water to any fixture without major demolition.
- HVAC duct zoning: Install motorized dampers that can be controlled via a smart thermostat, enabling room‑by‑room climate control.
6. Choose Adaptive Materials
Materials that can be reconfigured extend the lifespan of a renovation.
- Modular flooring systems: Interlocking tiles that can be lifted and replaced without grinding down subfloors.
- Reversible wall panels: Panels with magnetic or rail systems allow you to swap finishes or add insulation later.
- Acoustic‑friendly finishes: Use acoustic panels that double as art pieces; they can be repositioned as room functions change.
7. Integrate High‑Tech Coatings Wisely
Paint is no longer just a color choice. Advanced coatings can improve indoor air quality, reflect heat, and even monitor humidity.
Explore the possibilities of high‑tech coatings that self‑clean and resist mold, especially in bathrooms and basements.
8. Design for Seamless Power and Data Distribution
Every major room should have a “smart hub” spot—typically a wall box that houses:
- USB‑C and USB‑A outlets
- Standard 120 V receptacles
- Power over Ethernet (PoE) ports for security cameras, smart speakers, or IoT devices
Place these hubs at eye level near work surfaces to reduce clutter and improve ergonomics.
9. Prioritize Wellness‑Focused Systems
Wellness is more than a buzzword; it’s a measurable ROI.
- Air filtration: Install MERV‑13+ filters in HVAC and consider supplemental air purifiers in high‑traffic zones.
- Lighting: Use tunable white LEDs that mimic natural daylight cycles, reducing eye strain and improving sleep.
- Biophilic elements: Incorporate natural textures, living walls, or even simple indoor plant zones to boost morale.
10. Implement Smart Controls Early
Don’t wait until the finishes are in place to add automation. Early integration ensures wiring is hidden and reliable.
- Choose a central hub (e.g., a reputable open‑source platform) that can speak to lighting, HVAC, security, and entertainment systems.
- Map out scenes (e.g., “Work Mode,” “Family Movie,” “Nighttime”) that can be triggered by voice or smartphone.
- Ensure each device is firmware‑updatable to keep pace with security patches.
11. Validate Energy Performance with Real‑Time Data
After rough‑ins, run a temporary energy audit using portable data loggers. This gives you live metrics on:
- Peak demand periods
- HVAC efficiency under real occupancy
- Effectiveness of lighting controls
For a deeper exploration of live building data, check out the live building insights article.
12. Schedule a Phased Walk‑Through
Instead of one final inspection, conduct phased walk‑throughs:
- Rough‑in phase: Verify conduit placement, duct integrity, and plumbing manifolds.
- Pre‑finish phase: Test power distribution, network speeds, and sensor calibrations.
- Final phase: Confirm that finishes meet design intent and that all smart integrations function as intended.
This approach catches issues early, reducing re‑work and keeping the project on schedule.
13. Document Everything for Future Owners
A well‑documented renovation not only eases future upgrades but also adds resale value. Include:
- Annotated floor plans showing conduit routes and junction box locations.
- Warranty packets for smart devices, coatings, and mechanical equipment.
- A digital “owner’s manual” (PDF) that explains how to operate and maintain each system.
14. Plan for Seamless Handover
When the project wraps, schedule a comprehensive handover:
- Walk the homeowner through each smart scene and demonstrate troubleshooting steps.
- Provide a list of service providers for HVAC, electrical, and tech support.
- Offer a post‑occupancy check‑in after 30 days to address any lingering issues.
15. Post‑Renovation Maintenance Checklist
Future‑ready homes need ongoing care. Recommend the following quarterly tasks:
- Inspect conduit and junction boxes for signs of wear or moisture.
- Update firmware on all smart hubs and devices.
- Clean and calibrate air filters and sensors.
- Re‑evaluate energy usage reports and adjust automation scripts as needed.
Putting It All Together
Renovations are no longer one‑off projects; they’re the first chapter in an evolving story of how a home serves its inhabitants. By treating the remodel as a platform build—complete with a robust infrastructure, adaptable finishes, and intelligent controls—you set the stage for decades of flexibility and value.
Use this checklist as your playbook, adapt it to your unique circumstances, and you’ll finish a renovation that feels as fresh three years from now as it does on day one.

Craig Brett is a freelancer with a passion for the outdoors. His love for nature inspires his work, bringing authentic and engaging perspectives to projects related to outdoor activities, adventure, and environmental topics.
Related Posts

The Ultimate Renovation Checklist for Historic Home Preservation
A detailed checklist guides you through researching, assessing structure, preserving original featur... Read More
Renovation Checklist: A Blueprint for Stress‑Free Transformations
A practical, stress‑free renovation checklist that guides homeowners through planning, budgeting, ... Read More
The Ultimate Renovation Checklist: A Step-by-Step Guide
A comprehensive renovation checklist is essential to ensure that your project stays on track, within... Read More
Top Posts

Eco‑Friendly Carpet Cleaning: DIY Solutions That Actually Work
Learn how to clean carpets naturally with enzyme‑rich recipes, protect fibers, and maintain a healthier home—all without pricey chemicals....Read More

Protect Your Home: The Ultimate Guide to Whole‑Home Surge Protection
Learn how a whole‑home surge protector shields every device, saves money, and fits into smart‑home and renewable energy systems—plus tips on selection, in...Read More

The Unexpected Power of Mixed‑Material Flooring: Style, Sound, and Sustainability
Explore the art of mixed‑material flooring—combining reclaimed wood, stone, and smart underlays—to boost acoustic comfort, sustainability, and timeless st...Read More

Green Waterproofing: Turning Eco‑Membranes Into a Strategic Asset
Discover the rise of green waterproofing, from bio‑based liquids to recycled sheet membranes, and learn why these eco‑options are now a strategic advantage ...Read More
0 Comments
Post Comment
You will need to Login or Register to comment on this post!