
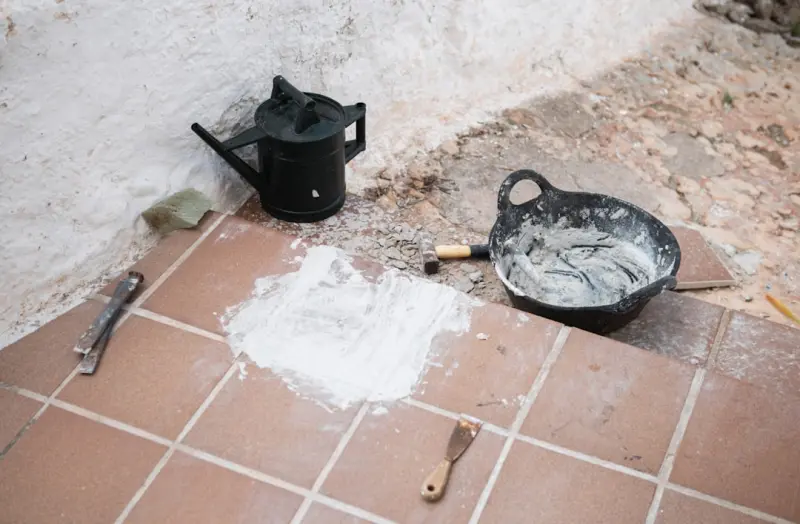
Why Floor Problems Matter More Than You Think
Most homeowners think of floor repair as a cosmetic task—just a matter of making it look good again. In reality, squeaky boards, shifting tiles, and hidden moisture can undermine structural integrity, invite pests, and raise energy bills. A floor that flexes or gaps lets drafts in, while a loose tile can become a tripping hazard. The good news? With the right mindset, a modest toolkit, and a systematic approach, you can resolve the most common floor issues without calling in a contractor.
Getting the Right Mindset: From “Fix‑It‑Later” to “Fix‑It‑Now”
DIY home repair success hinges on three mental habits:
- Curiosity: Treat every creak or crack as a clue rather than an annoyance.
- Patience: Rushing a repair often creates more work down the line.
- Resourcefulness: Leverage what you already have—old tools, reclaimed wood, even your smartphone’s camera.
When you adopt a detective’s mindset, you’ll find that many floor problems are easier to diagnose than you imagine. For instance, a squeak can be traced to a single board, while a cracked tile often points to sub‑floor movement or moisture that has seeped in over time.
Essential Tools for the DIY Floor Doctor
Before you start, assemble a kit that covers both hardwood and tile repairs. Here’s a concise checklist:
- Stud finder and laser level – to locate joists and confirm levelness.
- Rubber mallet and block of wood – for gently tapping floorboards back into place.
- Wood shims and construction adhesive – to fill gaps and reinforce loose boards.
- Utility knife, grout saw, and multi‑tool – for removing damaged tile and grout.
- Thinset mortar, backer board, and a notched trowel – for laying new tiles securely.
- Moisture meter – to detect hidden water that could compromise repairs.
- Safety gear: goggles, ear protection, and a dust mask.
Most of these items can be sourced from a local hardware store or borrowed from a neighbor. The key is to keep them organized in a sturdy tote so you’re always ready for the next squeak.
Step‑by‑Step: Silencing Squeaky Hardwood Floors
Squeaks usually arise when a floorboard rubs against a joist or when there’s a gap between the board and the sub‑floor. Follow these steps to locate and eliminate the noise.
1. Pinpoint the Source
Walk across the room and have a partner gently press down on each board while you listen. Mark the spot with a pencil.
2. Access the Joist
If the squeak occurs near a wall, you may be able to insert a zone‑crafting hack by removing a small baseboard section. Use a utility knife to cut the caulk, then pry the board away with a trim puller.
3. Tighten the Board
- Drill a small pilot hole through the board into the joist.
- Insert a wood screw (no longer than 1‑inch) and drive it just enough to pull the board snugly—avoid over‑tightening, which can cause the board to split.
4. Fill Gaps
If a gap remains, slide a thin wood shim into it and seal with construction adhesive. Wipe away excess adhesive immediately to prevent a sticky residue.
5. Reattach the Baseboard
Replace the baseboard, nail it back in place, and caulk the seam for a finished look.
Step‑by‑Step: Repairing Cracked or Loose Tiles
Tile damage is often more visible but can be just as insidious. Cracks may indicate sub‑floor movement, while loose tiles can allow water to seep beneath, causing mold.
1. Diagnose the Problem
Use a moisture meter to check the area around the cracked tile. Elevated moisture levels suggest a leak that should be addressed before re‑tiling.
2. Remove the Damaged Tile
- Score the grout surrounding the tile with a grout saw.
- Tap the tile gently with a hammer and chisel until it lifts.
- Clear any remaining thinset from the sub‑floor.
3. Assess the Sub‑Floor
If the substrate feels soft or uneven, apply a self‑leveling underlayment. This step is crucial for preventing future cracking.
4. Install Backer Board (If Needed)
For areas prone to moisture, especially bathrooms or kitchens, install a cementitious backer board. Secure it with corrosion‑resistant screws and seal the joints with thinset.
5. Apply Thinset Mortar
Mix the thinset according to the manufacturer’s directions. Using a notched trowel, spread a uniform layer on the substrate. The size of the trowel notch depends on tile size—larger tiles need a deeper notch.
6. Lay the New Tile
Press the tile firmly into the mortar, twisting slightly to seat it. Use tile spacers to maintain even grout lines.
7. Grout and Seal
After the thinset cures (usually 24 hours), remove spacers and apply grout. Wipe excess grout with a damp sponge and allow it to set. Finally, seal the grout to protect against stains and moisture.
Detecting Hidden Issues Before They Escalate
Floor repairs often expose deeper problems—like water intrusion, pest activity, or inadequate insulation. A proactive approach saves time and money.
Use Thermal Imaging
Thermal imaging can reveal cold spots, moisture pockets, and even hidden voids under floorboards. If you suspect a hidden leak, consider a thermal imaging inspection. Many rental tools now attach to smartphones, turning your device into a low‑cost infrared camera.
Check for Air Leaks
Even small gaps around floor edges can lead to drafts and higher heating bills. A simple “candle test” (holding a lit candle near seams) can show airflow. For a more thorough fix, read our guide on weather‑proof upgrades and seal any gaps with low‑expansion foam or weather‑strip.
Inspect for Pest Damage
Termites, carpenter ants, and rodents love the hidden space beneath floors. Look for sawdust, frass, or small holes in the wood. If you find evidence, treat the area with an appropriate insecticide and consider installing bait stations.
Choosing Sustainable Materials for Long‑Term Success
When you replace a damaged board or tile, you have an opportunity to upgrade to more sustainable options:
- Reclaimed hardwood: Gives a vintage look while diverting wood from landfills.
- Porcelain tiles made from recycled clays: Highly durable and low‑maintenance.
- Low‑VOC adhesives: Reduce indoor air pollutants.
These choices may carry a slightly higher upfront cost, but they extend the lifespan of your repair and contribute to a healthier home environment.
Budgeting Your DIY Floor Project
Here’s a rough cost breakdown for a typical 150‑sq‑ft repair:
- Tools (if you need to purchase): $80‑$150.
- Materials (shims, adhesive, grout, tile): $120‑$250.
- Optional thermal imaging rental: $30‑$50 per day.
By borrowing tools, reusing existing materials where possible, and tackling one room at a time, most homeowners can keep the total under $400.
Safety First: Protect Yourself and Your Home
Never underestimate safety when working with power tools, adhesives, or dust‑producing tasks. Follow these guidelines:
- Wear a dust mask when cutting wood or sanding tile.
- Use ear protection with rotary tools.
- Ensure proper ventilation when using solvents or adhesives.
- Turn off electricity in the work area when using power drills near wiring.
When to Call a Professional
While DIY can solve most floor issues, there are scenarios where a licensed contractor is the better choice:
- Extensive sub‑floor rot or water damage.
- Structural movement that affects multiple joists.
- Complex tile patterns that require precise alignment.
- Building codes that mandate professional installation (e.g., fire‑rated flooring in certain rooms).
Recognizing your limits ensures you don’t create a bigger problem—and it keeps your home safe.
Maintaining Your Floors After the Repair
Post‑repair care extends the life of your fix. Here are proven habits:
- Place felt pads under furniture legs to prevent future squeaks.
- Use area rugs in high‑traffic zones to protect tile and hardwood.
- Regularly sweep and vacuum to remove grit that can grind down surfaces.
- Re‑seal grout annually in wet areas to keep water out.
With these habits, your floor will stay stable, quiet, and attractive for years.
Final Thoughts: Empowerment Through DIY
Floor repair may seem daunting, but it’s a perfect entry point for the DIY homeowner. You’ll learn how to read your home’s subtle signals, use modern tools like thermal imaging, and apply sustainable practices that benefit both your wallet and the planet. The next time you hear a creak or see a cracked tile, you’ll have a clear, step‑by‑step plan—no contractor needed.

Craig Brett is a freelancer with a passion for the outdoors. His love for nature inspires his work, bringing authentic and engaging perspectives to projects related to outdoor activities, adventure, and environmental topics.
Related Posts
The Unconventional Toolbox: Repurposing Everyday Items for Quick Home Fixes
Learn how everyday objects like clothespins, rubber bands, and old credit cards can become powerful ... Read More
The Mobile Repair Cart: A DIYer's Ultimate Portable Workshop
Learn step-by-step how to create a mobile repair cart that organizes tools, adapts to seasonal proje... Read More

Everyday Tools That Turn Small Repairs into Big Savings
Learn how a well‑stocked toolbox, smart diagnosis, and easy repair tricks can turn everyday home i... Read More
Top Posts
The Silent Revenue Engine: How Strategic Waterproofing Fuels Commercial Success
A deep dive into why waterproofing should be treated as a strategic asset, exploring ROI, sensor integration, sustainability, and future trends that turn moistu...Read More

Beyond the Sheet: Unlocking the Full Potential of Modern Drywall
Explore how today’s drywall goes beyond simple partitioning, offering acoustic mastery, fire resistance, sustainable options, and integrated sensors that turn...Read More
The Secret Language of Paint: How Color, Finish, and Prep Transform Your Home
Explore the hidden power of paint—learn to choose colors, finishes, and prep methods that instantly elevate your home’s style and comfort....Read More

How Corporate Campuses Can Turn Tree Care Into a Competitive Edge
A deep dive into turning routine tree maintenance into a data‑driven, ESG‑friendly, cost‑saving strategy that enhances brand reputation and employee healt...Read More
0 Comments
Post Comment
You will need to Login or Register to comment on this post!