
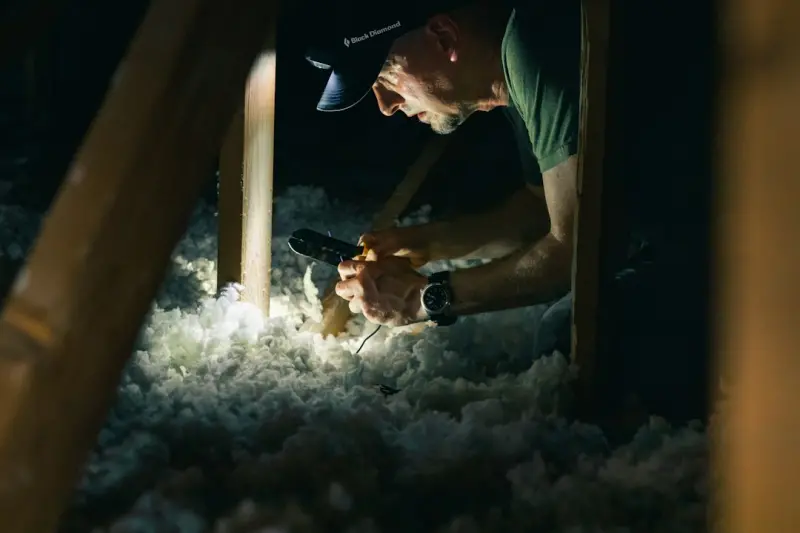
Why Your Home’s Insulation Is the Unsung Hero of DIY Repairs
When most homeowners think about “DIY home repairs,” the mind instantly jumps to leaky faucets, squeaky doors, or that stubborn tile that refuses to stay put. Yet, there’s a silent, invisible layer that can make or break the comfort, energy bills, and even the structural health of your house: insulation. I’ve spent the past decade digging into basements, tearing out old drywall, and swapping out decades‑old fiberglass. What I’ve learned is that a strategic insulation upgrade can be the most rewarding project you tackle—no need for a contractor, just a bit of curiosity, the right tools, and a willingness to get your hands a little dusty.
The Real Cost of Ignoring Insulation
Before you roll up your sleeves, let’s talk dollars and degrees. A poorly insulated home can lose up to 30% of its heating and cooling energy through walls, attics, and floors. That translates into higher utility bills, uneven room temperatures, and premature wear on your HVAC system. Moreover, moisture that migrates through gaps can foster mold, rot, and even compromise your home’s structural integrity. In short, insulation isn’t just a comfort upgrade—it’s a preventative maintenance measure that saves you money and headaches down the line.
Where to Start: The DIY Insulation Checklist
- Assess the Hot and Cold Spots – Walk through each room with a handheld infrared thermometer or, if you’re on a budget, the simple “hand test” (hold your hand near walls and windows). Note where you feel drafts or temperature swings.
- Identify the Type of Existing Insulation – Peek into your attic, crawlspace, and exterior walls (a small inspection hole can do wonders). Fiberglass batts, blown‑in cellulose, or spray foam each have distinct textures and performance metrics.
- Gather the Right Tools – Safety goggles, a respirator, utility knife, staple gun, measuring tape, and a high‑efficiency blower for cellulose or loose‑fill insulation.
- Check for Moisture – Before you add anything, make sure the area is dry. A quick DIY guide to detecting hidden leaks can help you locate and fix any water intrusion that would otherwise sabotage new insulation.
- Plan for Ventilation – Insulation works best when the home can breathe. Ensure soffit vents and attic fans are clear and functional.
Attic Insulation: The Low‑Hanging Fruit
The attic is often the most accessible and highest‑payoff area. If your attic floor feels like a draft tunnel, you’re likely missing the recommended R‑value (thermal resistance). Here’s my step‑by‑step approach:
- Seal Air Leaks First – Use caulk or expanding foam around recessed lights, vent chases, and any wiring penetrations. Even a 1/4‑inch gap can undermine insulation performance.
- Choose Your Insulation – For DIYers, blown‑in cellulose is a favorite because it fills irregular spaces without the need for perfect batts. If you prefer a “plug‑and‑play” solution, high‑density fiberglass batts work well in joist bays.
- Lay a Vapor Barrier (if needed) – In colder climates, a 6‑mil polyethylene sheet helps prevent moisture from migrating into the insulation. Remember to tape seams.
- Install the Insulation – For batts, cut to fit snugly between joists, leaving no gaps. For loose‑fill, rent a blower machine (often available at home‑center rental departments) and fill the cavity evenly.
- Finish with a Breeze Block – If your attic doubles as a storage space, consider a lightweight, breathable ceiling panel that protects the insulation while still allowing airflow.
Wall Insulation: Going Behind the Drywall
Wall insulation can be trickier because it usually involves cutting into the finished interior. However, the payoff—eliminating cold spots and improving soundproofing—is worth the effort.
- Identify Access Points – An interior closet, utility room, or even a removed outlet cover can serve as a small portal.
- Use a Drywall Saw – Cut a 12‑inch square opening near the top of the wall. Keep the cut away from studs to avoid structural issues.
- Blow‑In Cellulose – Rent a small handheld blower, feed cellulose through a flexible hose, and fill the cavity. This method works even if you have existing fiberglass batts that have settled.
- Seal the Opening – Patch the hole with a piece of drywall, joint compound, and sand smooth. Paint to match the surrounding wall.
Floor Insulation: Comfort Underfoot
If you have a crawlspace or a concrete slab, floor insulation can dramatically improve warmth in living areas and reduce condensation that leads to mold. Here’s how I tackled a basement slab:
- Prep the Surface – Clean the concrete, repair any cracks, and apply a vapor retarder.
- Lay Rigid Foam Boards – Choose XPS or polyiso boards with an R‑value of at least 5 per inch. Stagger the seams like brickwork and tape them.
- Cover with Subfloor – Install a tongue‑and‑groove plywood subfloor, securing it with concrete screws and construction adhesive.
- Finish with Flooring – From engineered hardwood to luxury vinyl, the new subfloor provides a stable, insulated base.
DIY Insulation and Energy Monitoring: A Symbiotic Relationship
Once you’ve upgraded insulation, you’ll likely notice a dip in your utility usage. To quantify that impact, consider pairing your project with a real‑time energy monitor. The insights you gain can guide you on further tweaks—perhaps a thermostat upgrade or sealing a stubborn duct leak. If you want to dive deeper into how data can transform home efficiency, check out real‑time energy inspection. It’s a game‑changer for the DIY enthusiast who loves numbers as much as tools.
Common Mistakes and How to Avoid Them
- Skipping Air Sealing – Insulation alone won’t stop drafts. Seal first, then insulate.
- Compressing Batts – Over‑stapling or compressing fiberglass reduces its R‑value. Lay it gently and let it expand.
- Forgetting Moisture Barriers – In humid climates, a vapor barrier is essential. Without it, you invite mold.
- Using the Wrong R‑Value – Local building codes dictate minimum R‑values. Check your climate zone before buying material.
- Neglecting Safety Gear – Fiberglass particles can irritate skin and lungs. Wear a respirator, gloves, and long sleeves.
Tools of the Trade: My DIY Insulation Kit
Having the right gear streamlines the process and keeps you safe. Here’s the compact kit I keep in my garage:
- Industrial‑grade respirator (N95 or higher)
- Heavy‑duty utility knife with extra blades
- Staple gun with 1‑inch staples (for batts)
- Measuring tape (at least 100 feet)
- Handheld infrared thermometer
- Moisture meter (helps verify dry conditions)
- Rented blower machine (for cellulose)
- Roll of 6‑mil polyethylene vapor barrier
Finishing Touches: Making Your Insulation Work for You
After you’ve installed insulation, the job isn’t truly done until you fine‑tune the surrounding systems:
- Upgrade to a Smart Thermostat – Pairing your insulated envelope with precise temperature control maximizes savings.
- Re‑balance HVAC Ducts – Leaky ducts can undo your hard work. Seal them with mastic or foil tape.
- Install Door Sweeps – Even with wall insulation, an air‑leaky door can bring in drafts. Simple sweeps are cheap and effective.
- Regularly Inspect – Once a year, run a quick infrared scan to catch any new cold spots before they become problems.
From DIY to Pro: Scaling Your Skills
Mastering home insulation opens doors (literally) to more advanced projects: attic ventilation upgrades, radiant barrier installations, and even DIY radiant floor heating. Each step builds on the fundamentals you’ve just learned, turning a simple DIY repair into a comprehensive home performance strategy.
Wrap‑Up: The Quiet Power of a Well‑Insulated Home
Insulation isn’t flashy—there’s no gleaming new faucet or glossy countertop—but its impact is profound. A well‑insulated home feels steadier, costs less to heat and cool, and stands stronger against moisture and mold. By taking a methodical, safety‑first approach, you can achieve professional‑grade results without a crew. So, grab that respirator, rent a blower, and let the quiet transformation begin.

Tom Ferguson is a Canadian freelance writer with a passion for storytelling, current events, and thoughtful commentary. Drawing on years of writing experience, he shares engaging insights on a wide range of topics, bringing a uniquely Canadian perspective to his work.
Related Posts
The Unconventional Toolbox: Repurposing Everyday Items for Quick Home Fixes
Learn how everyday objects like clothespins, rubber bands, and old credit cards can become powerful ... Read More
Invisible Wins: Small DIY Repairs That Save Money and Boost Comfort
Learn how simple, often overlooked fixes—from draft‑proofing doors to sealing drywall cracks—c... Read More
DIY Home Repairs: Sustainable Solutions From a Veteran Contractor
Discover practical, sustainable DIY repair strategies that combine cost‑saving techniques with eco... Read More
Top Posts
Elevating Business Interiors with High‑Performance Drywall
Modern drywall goes beyond a simple partition, offering acoustic mastery, sustainability, fire safety, and built‑in data pathways that turn walls into strateg...Read More

The Hidden Cost of Ignoring Mold: A Proactive Playbook for Facility Managers
A facility manager’s guide to a proactive mold removal strategy that uses IAQ sensors, targeted remediation, and predictive analytics to protect occupants and...Read More

The Importance of Tree Care: A Comprehensive Guide
Tree care is crucial for maintaining the beauty and health of your property. Learn about the importance of pruning, planting, and maintenance to ensure your tre...Read More

Weather‑Smart Home Envelopes: Proven Strategies for Year‑Round Protection
A comprehensive guide to weather‑proofing your home, covering air tightness, water management, thermal continuity, and moisture control, with actionable steps...Read More
0 Comments
Post Comment
You will need to Login or Register to comment on this post!