
Why Weatherproofing Isn't Just a Seasonal Checklist
When I first started swapping shingles for drywall, I thought weatherproofing was a once‑a‑year sprint: grab a roll of caulk, tape the windows, and call it a day. Years later, after watching a roof buckle under a surprise storm and a basement flood from a rogue gutter, I realized that true weatherproofing is a continuous conversation between your home, the climate, and the technology that now lives inside the walls. In this post I’m pulling back the curtain on the tactics that turn a reactive “fix‑it‑later” mindset into a proactive, season‑by‑season strategy that keeps drafts out, moisture at bay, and your utility bills smiling.
The Core Philosophy: Layered Defense, Not a Single Shield
Think of your house as a medieval castle. The outer wall (the façade) deflects the first blow, the moat (site grading) drains the water before it reaches the foundation, and the inner keep (the envelope) protects the occupants from the lingering chill. Each layer must work in harmony; if one fails, the others are forced to compensate, and the cost of that compensation shows up as drafts, rot, or a spike in heating bills.
When you adopt this “layered defense” approach, you’ll find yourself asking different questions at each stage of the year:
- Spring: How do I prevent that melt‑water from sneaking under my siding?
- Summer: Which windows let in breezes without inviting solar overload?
- Fall: Are my seals still flexible enough to handle shrinking wood?
- Winter: Have I eliminated hidden drafts that turn my furnace into a hamster wheel?
1. Start at the Ground – Grading, Drainage, and the Forgotten Front Yard
The most overlooked entry point for water isn’t the roof; it’s the soil that surrounds your foundation. A gentle slope away from the house—about a 2% grade—directs runoff toward the street. If your yard is flat or slopes toward the foundation, consider installing a series of low‑profile swales or a French drain system. These solutions are less invasive than a full‑scale basement waterproofing project and can be tailored to the existing landscape.
Pro tip: Use a simple shovel test to check your grading. Dig a small trench about 12 inches deep around the perimeter and fill it with water. If the water hangs around the foundation after a few minutes, you have a problem.
2. Seal the Envelope – Windows, Doors, and the Magic of Weatherstripping
Most homeowners underestimate the cumulative loss caused by a single leaky window. A typical single‑pane unit can waste up to 25% of your heating load. Upgrading to double‑glazed, low‑E glass is an investment, but there’s a budget‑friendly middle ground: high‑performance weatherstripping.
Here’s my go‑to method:
- Choose a foam backer rod that fits the gap width.
- Apply a silicone sealant that remains flexible in low temperatures.
- Finish with a compression seal—a rubber or silicone profile that compresses when the window is closed.
For those who love data, consider pairing this physical upgrade with AI‑Powered Energy Inspection. The heat‑map analytics will highlight the exact spots where your home is losing energy, letting you prioritize the most leaky frames first.
3. The Façade – More Than Just Curb Appeal
A beautiful façade can double as a weather shield if you treat it like a living system. This is where Proactive Façade Maintenance steps in. By installing discreet moisture sensors behind the siding, you can get real‑time alerts the moment water infiltrates the wall cavity. The data feeds into a simple dashboard on your phone, prompting you to reseal a cracked joint before rot sets in.
Beyond sensors, think about the materials you’re using. Fiber‑cement siding, for example, offers superior resistance to wind‑driven rain compared to traditional wood lap siding. If you’re renovating, a thin layer of breathable membrane under the siding allows moisture to escape while keeping the wind out—a principle borrowed from modern commercial façades but now affordable for residential projects.
4. Roof and Eaves – The First Line of Defense
Roofs are the most obvious weather barrier, yet the details matter more than the shingles themselves. Inspect the eave overhang—it should extend at least 12 inches beyond the wall to shade windows in summer and keep rain from beating directly on the siding.
Don’t forget the flashing around chimneys, vent pipes, and skylights. A small gap can become a massive conduit for water. My favorite trick is to use a self‑adhesive roofing tape that can be applied in damp conditions and adheres for decades.
5. Ventilation – Let the Air Flow, But Not the Moisture
Sealing your home too tightly can trap humidity, leading to mold. The solution is balanced ventilation. A heat‑recovery ventilator (HRV) brings fresh air in while transferring heat from outgoing stale air, maintaining indoor comfort without sacrificing efficiency.
If an HRV feels like overkill, start with the simplest thing: smart exhaust fans in bathrooms and kitchens that turn on automatically when humidity spikes. Pair them with a humidity sensor in the basement for early detection of moisture buildup.
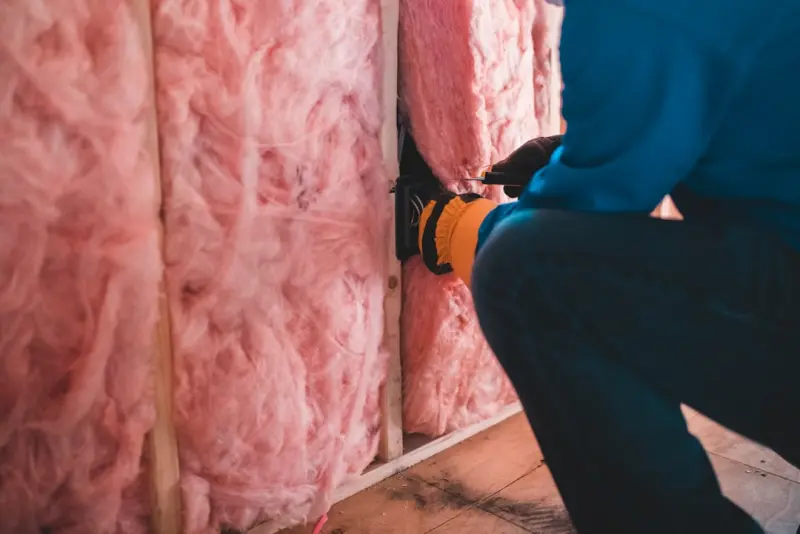
6. Insulation – The Unsung Hero of Weatherproofing
Insulation isn’t just about keeping the heat in; it’s also a barrier against drafts. In older homes, the cavity walls often have gaps where insulation has settled or shifted. An easy fix is to spray‑foam the perimeter of the attic and crawl spaces—this expands to seal cracks and offers an airtight seal.
For those who love a DIY challenge, consider blown‑in cellulose for wall cavities. It’s made from recycled paper, aligns with sustainable building practices, and conforms to irregular spaces better than rigid batts.
7. Smart Home Integration – Turning Data into Action
Modern weatherproofing isn’t complete without a bit of smart tech. Here are three low‑cost integrations that pay off quickly:
- Leak detection sensors under sinks and near water heaters. When they sense moisture, they send an instant push notification.
- Window/door contact sensors that alert you when a seal is compromised (e.g., after a big windstorm).
- Thermal cameras paired with your smartphone to spot cold spots in the walls during a cold snap.
When these devices speak the same language—through platforms like Home Assistant or Apple HomeKit—you can automate responses: close vents, turn on a dehumidifier, or even trigger a service call.
8. Seasonal Maintenance Calendar – Your 12‑Month Roadmap
All the technology in the world won’t help if you forget to act. Below is my personal calendar, refined over a decade of field experience:
| Month | Task |
|---|---|
| January | Check interior humidity levels; run HRV on a low setting. |
| February | Inspect attic insulation for settling; add blown‑in if needed. |
| March | Clean gutters and downspouts; test drainage slope. |
| April | Seal any exterior cracks discovered after spring rains. |
| May | Re‑apply weatherstripping on windows before the heat kicks in. |
| June | Check eave overhangs for rot; replace flashing where needed. |
| July | Run a full AI‑driven energy audit to catch hidden leaks. |
| August | Service the HRV and clean its filters. |
| September | Inspect exterior paint and siding for early signs of wear. |
| October | Install temporary weather‑resistant covers on any exposed vents. |
| November | Test all smart leak sensors; replace batteries. |
| December | Perform a final walkthrough with a thermal camera; address cold spots before the freeze. |
9. The ROI of Weatherproofing – It’s Not Just Comfort
Beyond the obvious comfort boost, weatherproofing directly influences:
- Energy bills: A well‑sealed envelope can shave 10‑30% off heating and cooling costs.
- Home resale value: Buyers notice a dry basement and efficient windows, often offering a premium.
- Maintenance frequency: Fewer leaks and drafts mean fewer emergency repairs.
In my experience, homeowners who invest in a systematic weatherproofing plan see payback within three to five years, especially when they leverage data‑driven insights from tools like AI‑powered inspections.
10. Closing Thoughts – Treat Your Home Like a Living System
Weather is an ever‑changing partner, not an adversary. By treating your home as a living system—one that breathes, shifts, and adapts—you’ll stay one step ahead of rain, wind, and heat. The secret isn’t a single miracle product; it’s a disciplined, data‑informed routine that respects the layered defense model.
If you’re ready to move from “patch‑and‑pray” to “predict‑and‑protect,” start with the basics: grade the yard, seal the envelope, and let smart sensors give you the early warning you need. The rest will follow, and before you know it, you’ll be the neighbor everyone asks for advice on staying comfortable when the storm rolls in.

Tom Ferguson is a Canadian freelance writer with a passion for storytelling, current events, and thoughtful commentary. Drawing on years of writing experience, he shares engaging insights on a wide range of topics, bringing a uniquely Canadian perspective to his work.
Related Posts

Micro‑Scale Weatherproofing: Small Tweaks, Massive Protection
A hands‑on guide to tiny yet powerful weatherproofing measures—seal gaps, improve drainage, add ... Read More

Seasonal Weather‑Proofing: A Homeowner’s DIY Playbook for Year‑Round Resilience
A practical, seasonal guide shows how to seal, drain, and fortify your home against weather threats,... Read More

Weathering the Storm: How Sustainable Home Additions Can Save Your Home
Learn how sustainable home additions can help protect your home from severe weather while reducing y... Read More
Top Posts

The Psychology of Snow Removal: Turning Winter Stress into Smart Routine
Learn to reframe snow removal as a purposeful routine, using smart planning, data tools, and neighborhood cooperation to reduce stress and boost efficiency....Read More

Decoding the Home Inspection Report: A Practical Guide for Buyers and Sellers
A step‑by‑step guide to interpreting home inspection reports, prioritizing repairs, and using the findings for smarter negotiations and long‑term maintena...Read More

Concrete Reinvented: Turning Grey Slabs into Green Assets
Concrete is shedding its reputation as a static, carbon‑heavy material. This article examines cutting‑edge trends—circular mix designs, self‑healing che...Read More

Layered Light: How to Light Your Home Smarter, Safer, and More Stylish
Learn how to create a three‑layer lighting system—ambient, task, and accent—that improves mood, saves energy, and integrates with smart home safety, using...Read More
0 Comments
Post Comment
You will need to Login or Register to comment on this post!