
When I first moved into my downtown loft, the only thing louder than the street traffic was the steady drip‑drip‑drip from a leaky faucet I never knew existed. I quickly learned that waiting for “the right moment” to tackle a repair only gave the problem more time to grow. That realization sparked a personal experiment: can I, a self‑declared non‑handyman, turn those tiny, nagging issues into quick wins without sacrificing my limited free time?
Why Small Fixes Matter More Than You Think
Most homeowners treat repairs as a binary choice: either ignore it until it becomes a crisis, or call a professional the moment something breaks. Both approaches have hidden costs. Ignoring a minor water stain can lead to mold, while hiring a pro for a squeaky hinge can eat into a budget you’re trying to stretch for a home‑office upgrade.
By addressing the micro‑issues—the loose cabinet knob, the drafty window seal, the cracked tile grout—you gain three major benefits:
- Cost savings: A handful of dollars for a simple part often prevents a $200 repair later.
- Time efficiency: Most small fixes take under 30 minutes, fitting neatly between work meetings and grocery runs.
- Psychological boost: Each completed task reinforces a sense of competence and control over your living space.
A Mindset Shift: Treat Repairs Like Mini‑Projects
Instead of seeing each fix as a random chore, I started grouping them into “mini‑projects.” A mini‑project is a collection of related tasks you can finish in a single sitting—think “kitchen cabinet refresh” or “bathroom seal‑up.” This approach mirrors the way we handle work sprints: define a clear goal, gather the needed tools, set a timer, and execute.
For example, last month I set aside an hour on a Saturday to:
- Replace three worn‑out cabinet hinges.
- Re‑caulk the kitchen sink edge.
- Touch‑up the paint on the pantry door.
By bundling them, I reduced the mental load of “what’s next?” and ended up with a noticeably fresher kitchen—all before dinner.
Toolbox Essentials for the Busy Homeowner
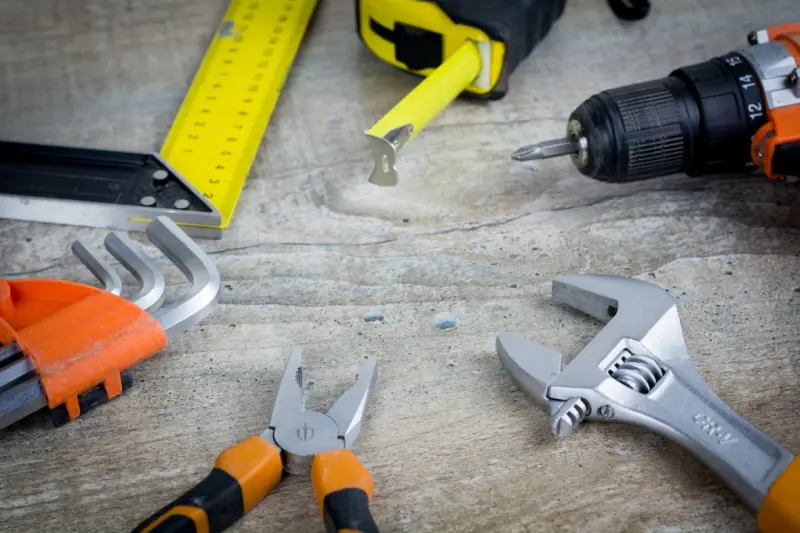
If you’re like me and prefer a tidy, portable set of tools, focus on versatility. Here’s my core 7‑item kit that fits comfortably in a small drawer:
- Adjustable wrench: Handles most pipe fittings and bolt sizes.
- Phillips & flat‑head screwdrivers: A pair with comfortable grips makes replacing hardware painless.
- Mini utility knife: Ideal for trimming caulk, opening paint cans, or cutting zip ties.
- Rubber mallet: Gentle enough for adjusting loose trim without denting wood.
- Thread‑locking tape (PTFE): A quick fix for leaking pipe threads.
- Silicone sealant (clear): For waterproofing sinks, bathtubs, and windows.
- LED flashlight with a magnetic base: Lights dark corners and holds onto metal surfaces while you work.
Beyond the basics, consider a multi‑bit screwdriver and a small hand saw for occasional woodwork. If you find yourself expanding your repertoire, you can always add specialized items later.
Step‑by‑Step Guides for Five Common Issues
Below are detailed walk‑throughs for the repairs that show up most often in my own to‑do list. Feel free to print this section and keep it on your fridge for quick reference.
1. Leaky Faucet Under the Sink
What you’ll need: Adjustable wrench, PTFE tape, silicone sealant.
- Turn off the water supply valves beneath the sink.
- Place a bucket under the faucet to catch any residual water.
- Use the wrench to loosen the faucet’s compression nut.
- Inspect the O‑ring; if it’s cracked, replace it.
- Wrap the threads of the faucet stem with two turns of PTFE tape.
- Re‑tighten the nut, turn the water back on, and test for drips.
If the leak persists, a thin line of silicone sealant around the base can often seal micro‑gaps without a full part replacement.
2. Squeaky Floorboards
What you’ll need: Rubber mallet, wood shims, screwdriver.
- Locate the squeak by walking slowly across the room and listening for the sound.
- Gently tap the board with the mallet; often the vibration will settle the loose nail.
- If the board remains loose, slide a thin wood shim into the gap between the subfloor and the board, then tap it flush with the mallet.
- Secure the shim with a tiny screw if needed, being careful not to split the wood.
For hardwood floors with visible gaps, a dab of wood glue on the shim can add extra hold.
3. Drafty Windows
What you’ll need: Weatherstripping tape, silicone sealant, a thin screwdriver.
- Close the window and run your hand around the frame to locate cold spots.
- Apply self‑adhesive weatherstripping to the side and top edges where the sash meets the frame.
- For larger gaps, run a thin bead of silicone sealant along the interior edge of the sash.
- Allow the sealant to cure for 24 hours before testing the draft with a lit incense stick or a piece of tissue.
4. Cracked Tile Grout
What you’ll need: Grout removal tool (or a small utility knife), new grout, rubber gloves.
- Scrape out the damaged grout using the removal tool, being careful not to chip the surrounding tiles.
- Mix the new grout according to the package instructions.
- Apply the grout with a rubber float, pressing it firmly into the joints.
- Wipe away excess grout with a damp sponge before it hardens.
- After 24 hours, seal the grout to protect against future stains.
5. Loose Cabinet Door Hinges
What you’ll need: Screwdriver, replacement hinge screws (optional), wood filler.
- Open the cabinet door and locate the loose screw.
- Remove the screw and tighten it firmly. If the wood is stripped, fill the hole with wood filler, let it dry, then re‑drill a pilot hole.
- Re‑attach the hinge and test the door for smooth operation.
For an extra polish, a quick wipe with a damp cloth will remove any residue and make the cabinet look as good as new.
Keeping Track: A Simple Repair Log
One habit that transformed my DIY experience was starting a repair log. I use a plain notebook with three columns: Date, Issue, and Solution + Parts Used. This log helps me:
- Identify recurring problems (e.g., a bathroom faucet that leaks every few months).
- Track which tools and supplies I already own, reducing duplicate purchases.
- Provide a clear record for future homeowners or renters, adding value to the property.
If you’re digitally inclined, a spreadsheet works just as well—just remember to keep it simple so you’ll actually use it.
When to Call a Professional
Even the most enthusiastic DIYer must recognize limits. Here are three red flags that signal it’s time to bring in an expert:
- Electrical work beyond a simple outlet swap: Incorrect wiring can be hazardous.
- Structural damage: Cracks that run through load‑bearing walls or floors require a structural engineer.
- Persistent plumbing issues: Repeated leaks after multiple attempts suggest a deeper pipe problem.
Calling a pro for these scenarios not only protects your safety but often saves money in the long run by preventing costly mishaps.
Sustainability and Cost Savings—A Tiny Revolution
While my primary motivation is convenience, I can’t ignore the environmental impact of a “replace‑everything” mindset. By extending the life of fixtures, I reduce waste and lower the demand for new manufacturing. This aligns nicely with broader sustainability trends—read more here—without having to overhaul an entire home.
Even something as small as resealing a bathtub can cut down on water loss. Replacing a cracked grout line not only prevents mold but also eliminates the need for a whole‑floor replacement later. Think of each micro‑fix as a tiny contribution to a larger ecological footprint reduction.
Conclusion: Make Micro‑Fixes a Habit, Not a Hassle
My experiment proved that with the right mindset, a modest tool kit, and a few minutes each week, you can keep your home in tip‑top shape without feeling overwhelmed. The key is to view each small repair as a mini‑project—a focused, time‑boxed effort that yields immediate, tangible results.
Next time you hear a drip, a creak, or a draft, remember: you have the power to fix it now, save money, and boost your confidence as a homeowner. And if you ever feel stuck, there’s a wealth of resources—learn more here—that can guide you through more complex tasks without turning you into a professional contractor.
Happy fixing!

When it comes to the world of blogging and writing, Rose DesRochers is a name that stands out. Her passion for creating quality content and connecting with her audience has made her a trusted voice in the industry. Aside from her skills as a writer and blogger, Rose is also known for her compassionate nature.
Related Posts

Everyday Tools That Turn Small Repairs into Big Savings
Learn how a well‑stocked toolbox, smart diagnosis, and easy repair tricks can turn everyday home i... Read More

DIY Home Repairs: Mastering the Art of Quick, Smart Fixes
Adopt a detective mindset, use the right tools, and follow step‑by‑step methods for plumbing, el... Read More

Patch Perfect: A DIY Guide to Flawless Drywall Repair
A comprehensive, step‑by‑step guide to repairing all types of drywall damage—from tiny cracks ... Read More
Top Posts

Breathing New Life into Your Outdoor Space: The Transformative Power of Awnings
Awnings can transform your outdoor space into a haven of comfort and style. Learn about the benefits, styles, and installation options of awnings....Read More

Transforming a Basement into a Multi‑Purpose Family Hub
Learn to convert your basement into a private, adaptable space that serves as a home office, gym, guest suite, and more, using smart tech and sustainable design...Read More

The Next Frontier: Smart Windows & Doors as Building Interfaces
Smart windows and doors are evolving from passive barriers into active, data‑rich interfaces that boost energy efficiency, improve occupant wellness, and enab...Read More

The Sustainable Revival of Furniture Restoration
Furniture restoration is an art form that requires patience, skill, and a deep understanding of materials and techniques. By embracing sustainable practices, we...Read More
0 Comments
Post Comment
You will need to Login or Register to comment on this post!