
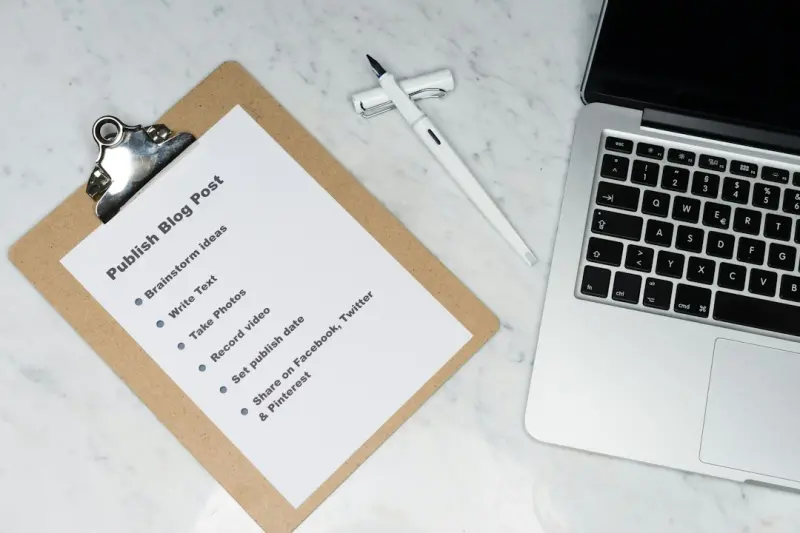
Why a Checklist Is the Secret Weapon Behind Every Successful Renovation
When I first stepped onto a construction site fresh out of trade school, I learned that the difference between a project that finishes on schedule and one that spirals into chaos is rarely the size of the budget or the complexity of the design. It’s the discipline of a well‑crafted checklist. A checklist forces you to confront the invisible tasks—permits, sequencing, stakeholder communication—that otherwise hide in the shadows until they explode into costly delays.
Step 1 – Define Your End‑Goal in Human Terms, Not Just Square Feet
Before the first line is drawn on a floor plan, ask yourself and your client:
- Who will use the space? A home office, a growing family, a senior‑friendly living area?
- What experiences matter most? Quiet focus, vibrant social gatherings, or seamless accessibility?
- How will the space evolve? Anticipate future tech upgrades, changing mobility needs, or possible resale scenarios.
Writing these answers down turns vague aspirations into concrete criteria that will guide every subsequent decision.
Step 2 – Audit the Existing Structure (The “Health Check”)
Most homeowners skip a thorough “as‑is” assessment, assuming that the building is sound because it’s been standing for years. That’s a dangerous shortcut. Conduct a systematic audit covering:
- Structural integrity: foundations, load‑bearing walls, roof framing.
- Envelope performance: check for leaks, drafts, and insulation gaps.
- Mechanical systems: HVAC, plumbing, electrical panels, and fire safety devices.
- Hidden hazards: asbestos, lead‑based paint, mold, and outdated wiring.
If you discover deficiencies, prioritize them in the checklist. This is also the perfect moment to reference the DIY Insulation Overhaul guide for quick wins that improve comfort and energy efficiency.
Step 3 – Secure Permits and Approvals Early
Permit applications can take weeks—or months—depending on jurisdiction. Missing a required permit is a legal risk and can halt construction on the spot. Your checklist should include:
- Identify required permits (building, electrical, plumbing, zoning).
- Gather supporting documents (site plans, engineering reports, contractor licenses).
- Submit applications and track approval dates.
- Schedule any required inspections ahead of time.
Tip: Assign a single point of contact—often the project manager or a dedicated compliance officer—to own this step. Centralizing communication reduces the chance of paperwork falling through the cracks.
Step 4 – Finalize the Budget With Contingency Buffers
A realistic budget is more than a sum of material costs and labor rates. It must also account for:
- Design fees and engineering consultations.
- Permit fees and impact fees.
- Contingency: 10‑15 % of the total for unexpected conditions.
- Soft costs: temporary utilities, site security, and waste disposal.
When you embed a contingency buffer, you give yourself breathing room to address surprises without derailing the project timeline.
Step 5 – Select the Right Delivery Method
Renovation projects can be delivered in several ways, each with distinct trade‑offs:
- Traditional design‑bid‑build: Ideal when you want tight control over design and cost.
- Design‑build: Faster, with a single entity responsible for both design and construction.
- Modular construction: Prefabricated components assembled on‑site, reducing waste and site disruption.
If you’re considering off‑site fabrication, the Modular Mastery article provides a deep dive into how this approach can accelerate timelines and improve quality control.
Step 6 – Develop a Detailed Project Schedule (The Timeline Matrix)
Transform your high‑level phases into a day‑by‑day matrix that includes:
- Milestones (permit approval, demolition start, rough‑in completion).
- Critical path activities (those that, if delayed, push the entire schedule).
- Lead times for material procurement (custom windows, specialty flooring).
- Buffer days for weather, inspections, and coordination meetings.
Use a simple spreadsheet or project‑management software that allows you to color‑code tasks by responsibility. Review the matrix weekly with all stakeholders to keep everyone aligned.
Step 7 – Coordinate Trades With a Master Communication Plan
Renovations are a symphony of trades—carpenters, electricians, plumbers, finishers. Miscommunication is the most common cause of re‑work. Your checklist should mandate:
- A shared digital hub (e.g., a cloud folder) for drawings, submittals, and RFIs.
- Weekly coordination meetings with a clear agenda.
- A “trade‑handoff” protocol that defines when one crew finishes and another begins.
- Contact sheets with 24‑hour emergency numbers for each subcontractor.
When each trade knows exactly when to arrive and what to expect, the site stays clean, safe, and productive.
Step 8 – Plan for Site Logistics and Safety
Even a small remodel can create a chaotic site if you don’t map out logistics. Include in your checklist:
- Material delivery windows to avoid blocking neighbor driveways.
- Secure storage for tools and off‑cuts (lockable containers, designated zones).
- Safety signage, PPE requirements, and a site‑specific safety plan.
- Dust control measures (negative‑pressure barriers, HEPA vacuums).
A clean, organized site not only protects workers but also maintains good neighbor relations—something that often goes unnoticed until a complaint is filed.
Step 9 – Quality Assurance & Inspection Protocols
Integrate quality checks into every phase rather than leaving them all for the final walkthrough. Your checklist should schedule:
- Rough‑in inspections (electrical, plumbing, framing) before covering walls.
- Material acceptance tests (e.g., moisture content of lumber, fire‑rating of doors).
- Mid‑project punch list reviews after major milestones.
- A final comprehensive inspection that includes code compliance and client sign‑off.
Document each inspection with photos and signed forms to create an audit trail that protects both you and the client.
Step 10 – Finalize Finish Selections and Procurement
Finishes are the most visible expression of a renovation, but they also cause delays when decisions are postponed. To avoid the “finish‑freeze” trap:
- Lock in all finish selections (paint colors, tile patterns, hardware) at least two weeks before the installation phase.
- Order long‑lead items early—custom cabinetry, specialty stone, high‑performance windows.
- Confirm sample approvals and maintain a “finish log” that tracks order numbers, delivery dates, and warranty information.
Having a finish log attached to your master schedule ensures that every item arrives on time, preventing idle labor on the site.
Step 11 – Prepare for Occupancy (The Handover Playbook)
The project isn’t truly complete until the occupants feel comfortable moving back in. Your final checklist items include:
- Deep cleaning of all surfaces, HVAC ducts, and windows.
- Providing the owner with an operations manual (warranty info, maintenance schedules, filter replacement reminders).
- Conducting a walkthrough with the client to review the punch list and obtain sign‑off.
- Scheduling a post‑occupancy check‑in 30 days after move‑in to address any latent issues.
This final touch not only enhances client satisfaction but also builds a foundation for future referrals.
Step 12 – Document Lessons Learned (Continuous Improvement)
Every renovation, even the smoothest, offers insights. Allocate time after project close‑out to capture:
- What went as planned and why.
- Unexpected challenges and how they were resolved.
- Ideas for refining the checklist for next projects.
Store these notes in a shared knowledge base so that each new project benefits from the collective experience of your team.
Putting It All Together: A Sample Checklist Template
Below is a condensed version you can copy into a spreadsheet or project‑management tool. Feel free to expand each item with sub‑tasks that suit your workflow.
1. Project Goal Definition
   - Stakeholder interviews
   - Success metrics
2. Existing Condition Audit
   - Structural inspection
   - Envelope performance test
   - Mechanical systems review
3. Permits & Approvals
   - List required permits
   - Gather documentation
   - Submit applications
   - Track inspection dates
4. Budget & Contingency
   - Cost estimate
   - Contingency allocation (10‑15 %)
   - Cash flow schedule
5. Delivery Method Selection
   - Evaluate traditional vs. design‑build vs. modular
   - Confirm contracts
6. Schedule Development
   - Milestones
   - Critical path
   - Lead times
   - Buffers
7. Trade Coordination
   - Digital hub setup
   - Weekly meeting calendar
   - Handoff protocol
8. Site Logistics & Safety
   - Delivery windows
   - Storage plan
   - Safety plan
   - Dust control
9. QA & Inspections
   - Rough‑in sign‑offs
   - Material tests
   - Mid‑project reviews
   - Final inspection
10. Finish Selection & Procurement
    - Lock‑in decisions
    - Order long‑lead items
    - Maintain finish log
11. Occupancy Preparation
    - Deep clean
    - Operations manual
    - Client walkthrough
    - Post‑occupancy follow‑up
12. Lessons Learned
    – Capture successes
    – Document challenges
    – Update checklist
Adapting this template to the scale of your project—whether it’s a single‑room refresh or a full‑home transformation—will keep you organized, accountable, and, most importantly, on schedule.
Final Thought: The Checklist as a Culture, Not Just a Tool
In my 20 years of renovating homes and commercial spaces, the most successful teams treat the checklist like a living document that reflects a culture of transparency and proactive problem‑solving. When every crew member, from the foreman to the junior carpenter, knows that “checking the box” is a promise to the client, the project flows with fewer surprises and higher satisfaction.
So, next time you stand on a demolition site with a coffee in hand, pull out your renovation checklist. Let it guide the conversation, the decisions, and the daily actions. In the end, it’s not just a list—it’s the blueprint for a stress‑free, high‑quality renovation that people love to talk about.

Paul Gray is a dynamic blogger based in Brampton, where he shares his life with his amazing wife, Sarah. Known for his engaging writing style and relatable insights, Paul has carved out a niche in the blogging world that resonates with readers from all walks of life. When he's not crafting captivating posts, you can find him savoring a cold beer or indulging in the latest blockbuster movie. With a friendly demeanor and a passion for storytelling, Paul brings a unique perspective to his work, making him not just a blogger, but a voice for those who appreciate the simple joys of life.
Related Posts

The Ultimate Renovation Checklist for Acoustic Excellence
A detailed, actionable checklist guides property managers and designers through acoustic planning, m... Read More

Strategic Renovation Checklist: Building Future‑Ready Spaces
A deep‑dive strategic renovation checklist that moves beyond a simple to‑do list, integrating vi... Read More
A Human‑Centric Renovation Checklist for the Hybrid Workplace
Discover a fresh renovation checklist that balances employee wellbeing, sustainability, and business... Read More
Top Posts

Why Modern Gutters Are the Unsung Heroes of Sustainable Home Design
Explore the hidden power of gutters in sustainable living. Learn about eco‑friendly materials, rainwater harvesting, maintenance tricks, and how gutters prote...Read More
From Storage to Sanctuary: Rethinking Sheds and Gazebos for Modern Life
Sheds and gazebos are evolving from storage closets to year‑round multifunctional spaces. Learn how to redesign them with flexible layouts, renewable energy, ...Read More
The Secret to a Wellness‑Focused Bathroom Renovation
Discover how to turn a standard bathroom into a wellness sanctuary using color psychology, sensory lighting, smart storage, and eco‑friendly materials....Read More
Garage Door Maintenance-as-a-Service: Turning Routine Upkeep into Strategic Value
A subscription model for garage door care shifts expenses from unpredictable repairs to predictable fees, adds predictive analytics, and turns doors into strate...Read More
0 Comments
Post Comment
You will need to Login or Register to comment on this post!