

Why Your Appliances Need a Health Check Before They Break
Imagine you’re mid‑morning, coffee is brewing, the dishwasher hums, and the fridge is keeping everything crisp. Then, without warning, the dishwasher sputters and stops, the coffee maker clicks dead, and the fridge’s light flickers. Most of us treat these moments as isolated incidents, but the truth is that modern appliances are intricate ecosystems that thrive on regular, proactive care. In this post, I’m pulling back the curtain on the hidden world of appliance health and showing you how a simple diagnostic routine can save you time, money, and a lot of frustration.
The Myth of “Set It and Forget It”
When manufacturers market a new refrigerator or washing machine, the messaging often centers on “smart” features, energy‑efficiency ratings, and sleek designs. What rarely makes the brochure is the reality that every motor, sensor, and control board is a mechanical organ that ages, wears, and eventually needs attention.
Most homeowners assume that an appliance will run flawlessly for its advertised lifespan—typically 10‑15 years for major kitchen gear. In practice, wear and tear show up long before the warranty expires, especially if the unit is subjected to heavy usage, fluctuating power quality, or environmental stressors like humidity and dust.
Three Early‑Warning Signals You’ve Been Ignoring
- Unusual Noises: A faint whine, a high‑pitched squeal, or a rhythmic thumping can indicate motor strain, loose components, or bearing fatigue.
- Energy Spikes: If your utility bill jumps without a clear reason, it could be that an appliance’s compressor or heating element is working harder than it should.
- Inconsistent Performance: A dishwasher that leaves spots on dishes, a dryer that takes longer to dry, or a refrigerator that cycles more frequently than normal are all subtle clues that something is off.
These symptoms are often dismissed as “normal wear,” but they’re actually the appliance’s way of screaming for a check‑up before a catastrophic failure.
How a Simple Diagnostic Routine Can Extend Lifespan
Think of your appliances like a car. You wouldn’t skip oil changes, tire rotations, or brake inspections. Yet many of us neglect the equivalent steps for our kitchen and laundry gear. A structured diagnostic routine doesn’t require a professional technician every time; it just needs a systematic approach and a few handy tools.
Step 1: Visual Inspection
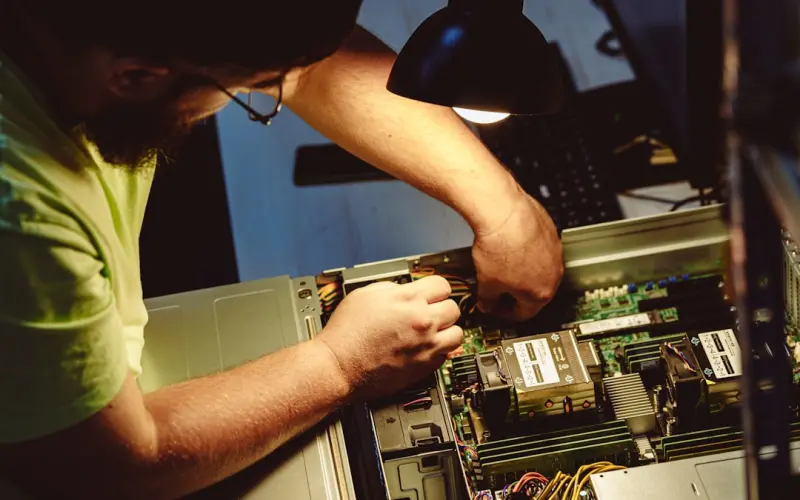
Open the service panels (always unplug first) and look for obvious issues: burnt wires, corroded connectors, or accumulated lint and debris. Even a quick dust‑off can improve airflow and reduce overheating.
Step 2: Power Quality Check
Use a plug‑in power meter to measure voltage fluctuations and harmonic distortion. Appliances are sensitive to spikes; a surge protector or line conditioner can mitigate damage caused by erratic power.
Step 3: Sensor Calibration
Many modern appliances rely on temperature, humidity, and load sensors. Run a self‑diagnosis (most high‑end models have a hidden menu accessed by a button sequence) to see if any sensor is out of range. If a sensor is misreading, the appliance may work harder than necessary, eating up energy and accelerating wear.
Step 4: Clean the Mechanical Heart
Fans, condensers, and pump impellers are the beating heart of refrigerators and washers. Remove dust, clean fan blades, and ensure pump hoses are free of blockages. A clean heart runs cooler, which translates to longer life.
Step 5: Log and Compare
Keep a simple spreadsheet of readings—voltage, noise levels (in decibels), and run times. Over weeks, you’ll notice trends that tell you whether an appliance is stabilizing or deteriorating.
Leveraging the Right Tools: Building Your Own Appliance Care Kit
Just as I’ve written about DIY Home Repair Kit essentials for general home maintenance, a focused set of tools can make appliance diagnostics painless. Here’s what to include:
- A digital multimeter for voltage and resistance checks.
- A plug‑in power quality meter (often called a “Kill‑A‑Watt”).
- A set of insulated screwdrivers and a torque wrench for precise fastener tightening.
- A handheld infrared thermometer for spotting hot spots on coils and heating elements.
- A small brush and vacuum attachment for clearing dust from fans and vents.
- Noise‑measuring app or a decibel meter to capture abnormal sounds.
Storing these tools in a clearly labeled bin—perhaps in the same closet where you keep your smart plumbing accessories—means you’re always ready to act when an appliance gives you a sign.
Predictive Maintenance Without the AI Hype
While the industry buzzes about AI‑driven predictive maintenance for large commercial systems, there’s a low‑tech version that works wonders for homeowners. By combining the data you collect in your diagnostic log with simple threshold rules, you can predict when a component is likely to fail.
For example, if your refrigerator’s compressor current rises by more than 15% over its baseline for three consecutive days, schedule a professional inspection. If the dryer’s exhaust temperature exceeds 200°F regularly, it’s a sign of clogged vents or a failing thermostat.
These rule‑based alerts can be set up in a spreadsheet with conditional formatting, or you can use free automation tools like IFTTT or Zapier to get email notifications. The result is a proactive maintenance schedule that feels high‑tech without the cost.
The Environmental Angle: Less Waste, More Savings
Appliance replacement is a hidden contributor to landfill waste and resource depletion. By extending the life of a fridge or washing machine, you’re not just saving dollars; you’re reducing the carbon footprint associated with manufacturing, shipping, and disposing of heavy equipment.
Moreover, a well‑maintained appliance runs more efficiently, which translates to lower utility bills. Studies show that a refrigerator with a dirty condenser can consume up to 30% more electricity. Simple cleaning and timely repairs can cut that waste dramatically.
When to Call in the Professionals
Even the most diligent DIY enthusiast hits a wall. Knowing when to step back and bring in a certified technician is a skill in itself. Here are the red flags that merit a professional’s touch:
- Repeated error codes after resetting the unit.
- Persistent leaks that you cannot trace to a hose or seal.
- Electrical arcing or burning smells—immediate hazard.
- Complex component replacements, like a sealed compressor or inverter board.
Most reputable service providers will honor a diagnostic fee that you can apply toward the repair cost if you choose to proceed. This arrangement ensures you’re not paying for a blind guess.
Case Study: Turning a “Dead” Dishwasher into a Reliable Workhorse
Last month, a client called me after his dishwasher stopped mid‑cycle. He’d tried the reset button, checked the power outlet, and even swapped the inlet hose—all to no avail. Here’s how a systematic approach saved him a $600 replacement.
- Power Quality Test: A portable meter revealed a 20% voltage sag during the dishwasher’s heating phase. The house’s old wiring was causing a drop.
- Thermal Sensor Check: The dishwasher’s temperature sensor was reading 10°C lower than actual, causing the heating element to overwork.
- Cleaning: A thorough cleaning of the spray arms and filter removed debris that was restricting water flow, reducing pump strain.
- Component Replacement: The faulty temperature sensor—$45 part—was replaced.
Result? The dishwasher now runs smoothly, the energy consumption dropped by 12%, and the client avoided a costly new unit. This is the power of a disciplined diagnostic routine.
Future‑Proofing: Choosing Appliances That Play Well With Maintenance
When it’s time to upgrade, consider the following criteria to ensure you’re buying a machine that will be easy to maintain:
- Modular Design: Appliances that allow you to replace individual parts (like a dishwasher rack or refrigerator fan) without dismantling the whole unit.
- Diagnostic Accessibility: Look for models with user‑friendly error codes and service menus.
- Standardized Parts: Brands that use industry‑standard screws and connectors simplify DIY repairs.
- Warranty Support: A robust warranty that includes annual service checks can be a sign of manufacturer confidence.
Investing a little extra upfront in an appliance with these traits can pay dividends in reduced downtime and lower repair costs over its life.
Wrapping Up: Make Appliance Health Part of Your Routine
Appliance repair doesn’t have to be a crisis‑driven scramble. By integrating a quick diagnostic check into your seasonal home maintenance schedule—think “spring clean” for your fridge and “pre‑holiday” review for your oven—you’ll keep your home running like a well‑tuned orchestra.
Remember: a small amount of time spent each month can prevent a costly breakdown, boost energy efficiency, and extend the life of the appliances you rely on daily. Treat your appliances with the same respect you give your car, and they’ll repay you with years of reliable service.

David MacKinnon is a dynamic freelance writer known for his captivating storytelling and keen insights into the world of technology. With a passion for exploring the intersection of innovation and everyday life, he crafts engaging narratives that not only inform but also inspire his readers.
Related Posts

The Hidden Benefits of Sustainable Appliance Repair
Learn why repairing appliances sustainably cuts costs, improves performance, and protects the enviro... Read More

When Your Fridge Starts Speaking: A Fresh Look at Appliance Repair
Learn how to shift from reactive fixes to proactive care, choose eco‑friendly repair partners, and... Read More
Why Proactive Appliance Repair Is Your Next Competitive Edge
A deep dive into turning appliance repair from a costly surprise into a proactive, data‑driven str... Read More
Top Posts
The Hidden Dangers of Dirty Ducts: Why Duct Cleaning Matters
Dirty ducts can harbor contaminants that exacerbate respiratory issues and reduce HVAC efficiency. Learn why duct cleaning matters and how to keep your ducts cl...Read More

Thermal Imaging & Data Analytics: A Fresh Take on Energy Inspection
Explore the power of infrared cameras and data analytics to uncover hidden energy loss, integrate occupant habits, and create a DIY checklist for smarter, costâ...Read More

The Critical Role of Sustainable Practices in Home Inspections: A Comprehensive Guide
A comprehensive home inspection should consider sustainable practices, energy efficiency, and environmental impact. Learn how sustainable home inspections can b...Read More

Concrete as a Creative Canvas: Transforming Spaces with Sustainable Style
Explore the artistic side of concrete, from stamping and staining to eco‑friendly mixes, and learn how to make this versatile material a standout feature in a...Read More
0 Comments
Post Comment
You will need to Login or Register to comment on this post!