
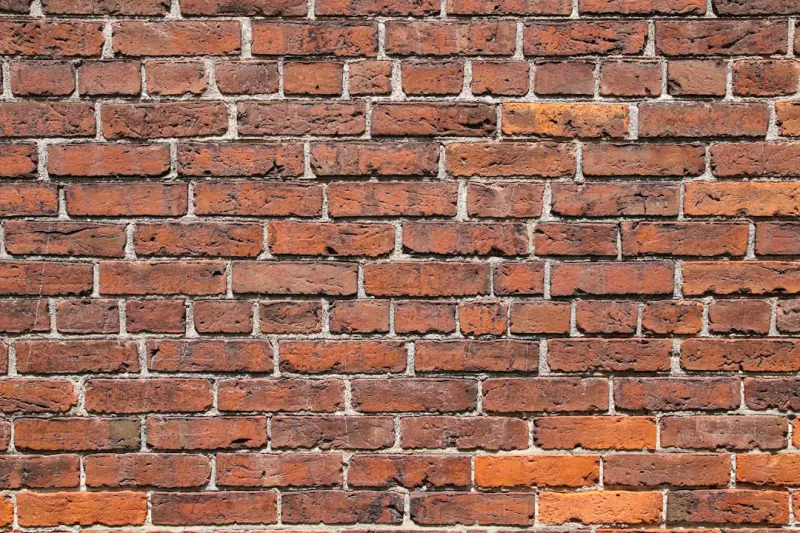
Why Exposed Brick Deserves a Second Chance
When I first walked into a 1920s bungalow with a faded, cracked brick wall, I felt a rush of nostalgia mixed with the challenge of turning a tired surface into a showcase; the raw texture of brick carries stories that paint and drywall can never replicate, and I’ve learned that restoring it isn’t just about aesthetics but about preserving a piece of the home’s soul. Over the years, I’ve seen homeowners either cover brick with cheap panels or abandon it altogether, yet the most rewarding transformations happen when we honor the original material and let it shine again, proving that a little patience and the right techniques can convert a liability into a living work of art. In this guide I’ll walk you through the entire process—from diagnosis to final seal—so you can confidently restore exposed brick and create a timeless backdrop that adds character, value, and warmth to any room.
Diagnosing the Condition: What Your Brick is Trying to Tell You
The first step in any restoration project is a thorough assessment, and brick walls are no exception; you’ll want to look for signs of moisture infiltration, spalling, mortar erosion, and any loose or missing units, because each flaw points to a specific remedy that can save you time and money later on. I always start by tapping the surface with a rubber mallet; a solid, resonant sound indicates a well‑bonded brick, while a hollow thud signals delamination that requires careful re‑anchoring, and this simple test, combined with a moisture meter, can reveal hidden issues that aren’t visible to the naked eye. Once you’ve mapped problem areas, sketch a plan that prioritizes structural repairs before aesthetic touches, and remember that a well‑documented inspection not only guides your work but also provides valuable documentation for future resale conversations.
Cleaning the Surface: Gentle Yet Effective Techniques
Before you think about repairing mortar or applying sealants, the brick must be impeccably clean; I recommend starting with a low‑pressure water rinse to loosen surface dust, then using a soft‑bristle brush and a pH‑neutral cleaner specifically formulated for masonry, because harsh chemicals can etch the pores and weaken the brick’s ability to breathe. For stubborn stains like oil or rust, a poultice of baking soda and water applied for 30 minutes can draw out discoloration without abrasive scrubbing, and always follow up with a thorough rinse and allow the wall to dry completely—ideally 48 hours—so that any subsequent work adheres properly. If you’re unsure about the right cleaner, check out the techniques discussed in Smart Carpet Cleaning for guidance on low‑impact cleaning solutions that protect delicate surfaces.
Repointing Mortar: The Heartbeat of Brick Restoration
Mortar joints are the glue that holds your brick wall together, and over time they can crumble, crack, or shrink, leading to gaps that invite moisture; the best approach is to remove deteriorated mortar to a depth of about three‑quarters of the brick width using a handheld grinder or a mortar raking tool, taking care not to damage the surrounding units, and then mix a new lime‑based mortar that matches the original in composition and color for a seamless blend. I always add a small amount of polymer admixture to the mix, which enhances flexibility and adhesion, especially in climates with freeze‑thaw cycles, and once the fresh mortar is applied with a pointing trowel, it should be shaped to the historic profile using a joint‑rounding tool, ensuring both structural integrity and visual consistency. After the mortar cures—typically 48 to 72 hours—you’ll notice an immediate improvement in stability, and the wall will begin to exude a renewed sense of solidity that you can feel when you run your hand across it.
Choosing a Finish: From Natural Patina to Modern Stain
With the brick now clean and structurally sound, you can decide whether to preserve its natural, weathered look or introduce a subtle hue that complements your interior palette; a penetrating brick stain can enhance color uniformity without forming a film, allowing the material to breathe while adding depth, whereas a clear breathable sealer provides protection against stains and moisture without altering appearance, which is ideal for high‑traffic areas. I’ve found that a light wash of earth‑tone pigment mixed with a water‑based penetrating sealer delivers a balanced look—muted enough to retain authenticity yet rich enough to make the wall a focal point, and this approach works especially well in kitchens where occasional splatters are inevitable. If you crave a more dramatic effect, consider a limewash that creates a chalky, matte finish reminiscent of historic European homes, but remember to test a small section first to gauge how the texture evolves as it dries.
Integrating Modern Elements Without Compromising Character
Restoring brick doesn’t mean you have to live in the past; I love pairing the rugged texture with contemporary fixtures like sleek metal sconces, floating shelves, or minimalist artwork, because the contrast amplifies both the old and the new, creating a dialogue that feels intentional rather than accidental, and these additions can be anchored with discreet brackets that avoid drilling into the brick itself, preserving its integrity. For those who enjoy a touch of warmth, installing reclaimed wood trim around the brick can echo historic detailing while providing a visual break, and if you’re concerned about thermal performance, an insulated panel system behind the brick can improve energy efficiency without obscuring the surface, a solution that blends comfort with heritage. When selecting hardware, opt for corrosion‑resistant finishes such as brushed nickel or oil‑rubbed bronze, which complement the earthy tones of brick while standing up to daily use.
Energy Efficiency and Comfort: Making Brick Work for You
One common misconception is that exposed brick walls are cold and drafty, yet when properly restored they can actually act as a thermal mass that stabilizes indoor temperature, absorbing heat in summer and releasing it in winter, and to maximize this benefit you can add a thin layer of breathable insulation behind the brick, such as mineral wool, which enhances R‑value without trapping moisture—a critical factor for longevity. I also recommend sealing any remaining gaps around windows and doors with high‑quality caulk, because air infiltration can undermine the comfort gains you achieve with brick, and installing programmable thermostats helps you fine‑tune heating and cooling cycles to take advantage of the brick’s natural regulation properties. For a holistic approach, consider pairing brick restoration with a smart home energy audit, similar to the strategies highlighted in Design‑Build Mastery, to ensure every element of your home works synergistically toward lower bills and a smaller carbon footprint.
Maintenance Routine: Keeping Your Restored Brick Pristine
After the excitement of restoration, the real test is long‑term upkeep, and I advise homeowners to adopt a simple maintenance schedule: sweep the wall with a soft broom monthly to remove dust, spot‑clean stains promptly with a pH‑neutral cleaner, and perform a visual inspection of mortar joints twice a year, re‑pointing any emerging cracks before they widen, because early intervention is far less costly than major repairs. Seasonal checks for moisture intrusion are also essential; during rainy periods, inspect the exterior flashing and gutters to ensure water is directed away from the brick, as exterior moisture can travel inward and compromise the interior finish you worked so hard to achieve. Finally, consider a professional resealing every five to seven years, especially in high‑traffic spaces, to maintain the protective barrier and keep the brick looking vibrant for generations to come.
Final Thoughts: Brick as a Living Piece of Home History
Restoring exposed brick is more than a renovation project; it’s an invitation to connect with the stories embedded in your walls, and by following a methodical process of assessment, cleaning, repair, finishing, and maintenance, you’ll not only enhance the visual appeal of your home but also add durable, sustainable value that honors the past while embracing the future. My own journey from skeptical homeowner to brick enthusiast taught me that patience, the right tools, and a respect for the material’s innate qualities can transform a neglected surface into a centerpiece that sparks conversation and admiration, and I encourage you to embark on this rewarding adventure with confidence and curiosity. Remember, each brick you restore is a small triumph over time, a testament to craftsmanship, and a lasting legacy that future occupants will cherish.

Tom Ferguson is a Canadian freelance writer with a passion for storytelling, current events, and thoughtful commentary. Drawing on years of writing experience, he shares engaging insights on a wide range of topics, bringing a uniquely Canadian perspective to his work.
Related Posts
Embracing Sustainable Home Restoration: A Path to Energy Efficiency and Environmental Responsibility
Learn how to create a sustainable home restoration project that prioritizes energy efficiency, eco-f... Read More

Breathing New Life into Aging Homes: A Sustainable Restoration Playbook
A deep dive into holistic home restoration, blending reclaimed materials, nanocoated paints, and sma... Read More
Reviving Original Wood Floors: A Homeowner’s Guide to Timeless Restoration
A step‑by‑step guide to restoring original wood floors, blending historic preservation with mode... Read More
Top Posts

Renovation Checklist: A Strategic Playbook for Seamless Transformations
An in‑depth, actionable renovation checklist that walks you through every phase—from planning and permitting to final walkthrough—ensuring a smooth, costâ...Read More

Reinventing Window Treatments: The New Frontier of Wellness and Productivity
Explore how adaptive window treatments transform indoor environments by enhancing health, reducing noise, conserving energy, and reinforcing brand identity, all...Read More
Warm Floors, Smart Data: Transforming Radiant Heating into a Business Asset
Explore the evolution of floor heating from a comfort feature to a data‑rich platform that drives energy efficiency, employee health, and strategic value for ...Read More

Urban Micro‑Gardens: Maximizing Green Space on Small Balconies
Learn to transform a modest balcony into a vibrant micro‑garden using smart containers, sustainable soil mixes, and clever water strategies for year‑round u...Read More
0 Comments
Post Comment
You will need to Login or Register to comment on this post!