
Why Vertical Modular Additions Are the Future of Home Expansion
When I first bought my modest two‑story townhouse, the biggest challenge wasn’t the square footage—it was the vertical limitation. My family grew, my work shifted to remote collaborations, and suddenly the same three bedrooms felt cramped. Traditional expansions meant tearing down walls, re‑routing plumbing, and negotiating with city permits for months on end. I wanted a solution that respected my timeline, budget, and the delicate balance between old‑world charm and new‑world technology.
Enter vertical modular additions—a concept that blends prefabricated efficiency with design elegance. Think of them as “building blocks” you can stack, detach, or reconfigure without the chaos of conventional construction. In this post I’ll walk you through the why, how, and what‑of‑this‑approach, drawing on my own pilot project and the latest industry insights.
The Core Benefits of Building Up, Not Out
Most homeowners instinctively think “add a room on the back” when they need more space. Yet a vertical module offers several distinct advantages:
- Footprint Preservation – Urban lots are shrinking, but zoning laws often allow increased floor‑area ratios when the expansion is vertical.
- Speed of Installation – Factory‑built modules can be assembled on‑site in days, not months.
- Predictable Cost – With components pre‑engineered, there’s far less surprise when the invoice arrives.
- Reversibility – If you ever need to downsize, modules can be relocated or even sold as standalone units.
- Design Flexibility – Modern modules come with integrated HVAC, smart‑glass, and acoustic panels that you can tailor to specific uses.
Designing a Modular Suite: From Concept to Reality
My first experiment was a “flex office pod” that perched atop the existing roofline, connected to the main house via a glazed stairwell. Here’s the step‑by‑step process I followed, which you can adapt to any project.
1. Define the Function First
Ask yourself: What will this space primarily serve? A home office, a guest suite, a wellness studio? The answer dictates ceiling height, load‑bearing requirements, and even window placement.
For my pod, the need was two‑fold: a quiet work environment and an inspirational view of the city. That led me to prioritize acoustic insulation and floor‑to‑ceiling glazing.
2. Choose the Structural System
There are three dominant systems in the market today:
- Cross‑Laminated Timber (CLT) – Offers a warm aesthetic, carbon‑negative credentials, and excellent structural capacity.
- Steel Frame Panels – Best for industrial‑style interiors and quick bolting on‑site.
- Pre‑stressed Concrete Modules – Ideal for high‑rise additions where fire rating is paramount.
I opted for CLT because it aligned with my sustainability goals and allowed for seamless integration with the existing timber joists.
3. Integrate Smart Envelope Technologies
Modern modules aren’t just walls; they’re living skins. By pairing the enclosure with AI‑powered glazing, the glass automatically tints in response to sunlight, reduces glare, and even adjusts its thermal performance based on indoor temperature. The result? A space that feels “in tune” with the environment without manual thermostat fiddling.
Speaking of temperature, the next generation of insulation offers an intelligent thermal skin that reacts to humidity and external weather patterns, maintaining comfort while slashing energy use.
4. Plan the Services Corridor
One of the biggest pitfalls in vertical additions is under‑estimating the complexity of routing utilities. My solution was a dedicated “service core”—a narrow shaft that houses electrical, plumbing, and data conduits. Because the module is prefabricated, the core can be pre‑wired in the factory, dramatically reducing on‑site labor.
5. Embrace Flexible Interior Architecture
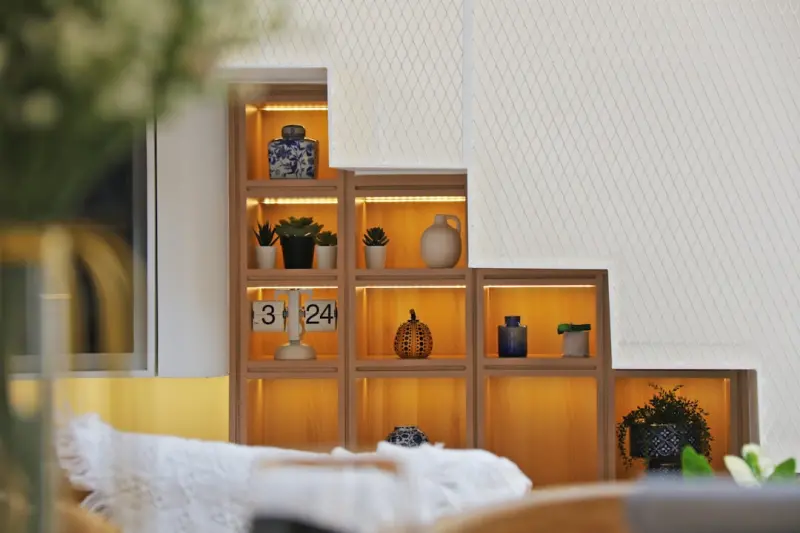
Rather than a static layout, I drew inspiration from flexible closet architecture. The pod’s built‑in shelving system can slide, fold, or expand, turning a simple storage wall into a dynamic workstation. This adaptability is key for multi‑use spaces that may transition from a yoga studio to a guest bedroom.
Acoustic Mastery: The Unsung Hero of Home Additions
When you’re adding a space that will host video calls, music practice, or meditation, sound control becomes paramount. Traditional construction often overlooks this, resulting in echoey rooms or noise bleed into the main house.
In my pod, I layered three acoustic treatments:
- Mass‑Loaded Vinyl (MLV) behind the interior sheathing to block low‑frequency transmission.
- Acoustic Foam Panels on the ceiling to absorb mid‑range frequencies.
- Diffusive Wood Slats on one wall, adding visual warmth while scattering sound waves.
These measures turned the pod into a “quiet bubble” that rivals professionally built recording studios—all without compromising the sleek aesthetic.
Sustainability: Making the Addition Green from the Ground Up
Vertical modular additions have an inherent environmental advantage: they reduce waste. Factories cut material precisely, and leftover off‑cuts can be repurposed for other projects.
Beyond the manufacturing stage, consider the following sustainable practices:
- Passive Solar Orientation – Position glazing to capture winter sun while using shading devices for summer heat.
- Rainwater Harvest Integration – Install a modest gutter system that channels water to a storage tank for the pod’s bathroom or irrigation.
- Renewable Energy Compatibility – Design the electrical panel to accommodate future solar panel hookups, even if you don’t install them immediately.
Regulatory Hurdles and How to Navigate Them
Every municipality has its own set of rules governing vertical expansions. In my city, the key requirements were:
- Maximum height relative to the street front.
- Setback distances from neighboring properties.
- Fire‑rating compliance for exterior walls.
The good news: many jurisdictions treat modular units as “manufactured homes” for permitting purposes, which can streamline the approval process. I partnered with a local architect who specialized in modular compliance; together we prepared a “one‑page” packet that included structural calculations, fire‑rating certificates, and a 3‑D model. The city approved the permit within three weeks—a stark contrast to the typical 8‑12 week timeline for conventional additions.
Cost Breakdown: What to Expect
Below is a realistic cost estimate for a 250‑sq‑ft modular pod, based on my experience and market data:
| Item | Cost Range (USD) |
|---|---|
| Factory‑Built Module (CLT structure) | $45,000 – $55,000 |
| AI‑Powered Glazing (per window) | $2,500 – $3,500 |
| Intelligent Insulation Layer | $5,000 – $7,000 |
| Acoustic Treatment Package | $3,000 – $4,500 |
| Service Core Installation | $8,000 – $10,000 |
| Interior Finish (flooring, cabinetry) | $6,000 – $9,000 |
| Permits & Professional Fees | $4,000 – $6,000 |
| Total | $73,500 – $95,000 |
While this figure may seem high at first glance, remember you’re acquiring a fully functional, tech‑enabled living space that could have taken a year and far more hidden costs to build conventionally.
Real‑World Use Cases: Inspiration for Your Next Project
Below are three scenarios where a vertical modular addition shines:
- Multi‑Generational Living – A compact in‑law suite with private bathroom, separate entrance, and soundproof walls.
- Home‑Based Business – A client‑meeting suite that can be locked down during non‑business hours.
- Wellness Retreat – A yoga studio with skylights, natural wood finishes, and integrated air purification.
Each case benefits from the modular approach’s speed, sustainability, and adaptability.
Future‑Proofing: Making Your Addition Ready for the Next Decade
Technology evolves quickly, but a well‑designed modular pod can stay relevant. Here’s how to future‑proof your addition:
- Pre‑Wired Conduits – Install extra data pathways now; you’ll thank yourself when 5G or fiber upgrades arrive.
- Modular Furniture Systems – Choose pieces that can be re‑configured, mirroring the flexibility of the pod itself.
- Smart Home Integration – Adopt a platform-agnostic hub (e.g., Matter‑compatible) so future devices plug in seamlessly.
By thinking ahead, the pod can evolve from a simple office to a smart home theater, a micro‑apartment, or even a rental unit that generates passive income.
Key Takeaways
Vertical modular additions offer a compelling answer to the age‑old dilemma of “more space without more hassle.” They combine:
- Speedy construction and cost predictability,
- Eco‑friendly manufacturing and operational efficiency,
- Design versatility that supports a range of lifestyles, and
- Future‑ready infrastructure for emerging tech.
My own journey from a cramped home office to a sun‑lit, acoustically tuned pod demonstrates that these structures are not just a trend—they’re a practical, resilient solution for homeowners who demand both function and finesse.
Ready to Stack Your Space?
If you’re curious about how a modular vertical addition could work for your property, start by mapping out the core function you need and consulting with a local architect experienced in prefabricated systems. The sooner you engage, the faster you’ll see your new floor plan take shape—literally—one module at a time.

Lifan Chen is a freelancer based in Toronto specializing in marketing. With expertise in crafting effective marketing strategies and campaigns, Lifan helps businesses grow their brand presence and reach target audiences. As a Toronto-based freelancer, Lifan combines local market insights with creative marketing skills to deliver tailored solutions for clients.
Related Posts

Designing a Home Addition That Grows With Your Family
A forward‑thinking guide to home additions that anticipate family milestones, incorporate flexible... Read More

Embracing Sustainable Home Additions: A Comprehensive Guide
Learn how to create a more sustainable home with our comprehensive guide to eco-friendly home additi... Read More
Unlocking Your Home’s Hidden Square Footage: The Ultimate Guide to Attic Conversions
Discover a step‑by‑step guide to converting your attic into a valuable living space, covering st... Read More
Top Posts

The Invisible Advantage: How Smart Insulation Is Redefining Building Performance
Insulation is evolving from a passive barrier to a data‑driven performance layer. Learn how advanced materials, embedded sensors, and AI control can cut energ...Read More
Roofing Redefined: Turning Your Building’s Crown into a Smart, Sustainable Asset
Explore the future of roofing as a strategic platform that combines smart sensors, carbon‑negative materials, and solar storage to cut costs, boost property v...Read More
Reimagining Commercial Spaces: A Blueprint for Adaptive, Healthy, and Sustainable Renovations
A fresh perspective on commercial renovations that blends flexibility, wellness, and sustainability, guiding businesses to create adaptable, brand‑aligned wor...Read More
Smart Sensors Meet Home Restoration: A New Age of Precision
A deep dive into the role of smart sensors in modern home restoration, revealing how data‑driven insights, sustainable materials, and proactive maintenance ar...Read More
0 Comments
Post Comment
You will need to Login or Register to comment on this post!